
This is a guest post from Gabby of Mom Makes Joy
I would say (though I’m certainly biased) that I was a pretty decent student in high school. I did my homework, I got pretty good grades, I turned my assignments in on time. I’m sure you can imagine, then, that I was surprised one afternoon during my senior year when my art teacher called me in and explained I was going to fail a simple stamp-making project if I didn’t finish it the next day. We were supposed to turn in a booklet containing different images made from stamps we carved out of linoleum. We had two weeks to finish the booklet, and I hadn’t even started it.
You see, I loved making those stamps. There is something fun and strangely therapeutic about carving chunks out of linoleum, you know? Maybe that’s just me. Anyway, I enjoyed the process so much that I spent the entire two weeks carving out stamp upon stamp without giving any thought to the booklet I was supposed to make with them! Fortunately, I had enough stamps made by that point that finishing the booklet project didn’t take long.
I enjoyed making those stamps so much, I thought I would share today how you can make your own stamps too!
Here is what you need:
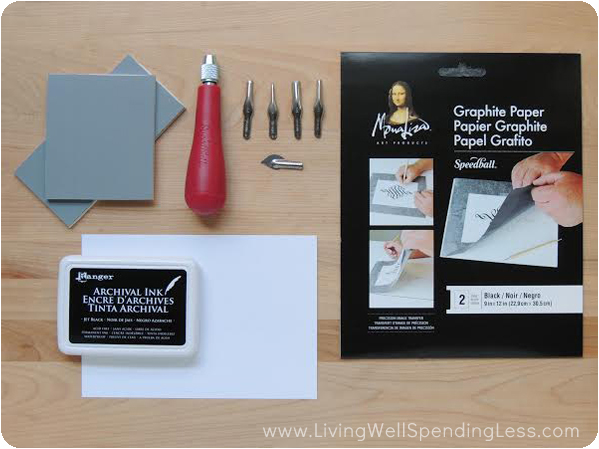
Unmounted linoleum for printmakingLinoleum cutter with assorted blades
Paper
Pencil
Graphite transfer paper (optional) Archival Ink Pad
Tracing paper (optional)
A couple tips on purchasing supplies:
You can purchase linoleum blocks for printmaking as well as a linoleum cutter and blades at your local art supply store or online. I found I got the best deal for my linoleum cutter on Amazon, where a starter kit with five different blades was around $10 with free shipping (compared to $17.99 at my local craft store!).
When choosing your linoleum block, I recommend a medium thickness linoleum, something between 1/8 and 1/4 of an inch thick. Blocks thicker than this are usually more expensive while blocks too thin potentially make getting a crisp stamped image more difficult. Your linoleum should be firm but soft enough to get a smooth carve. You can purchase linoleum blocks online or at an art supply store; your local hardware store may even carry the kind you need for a better price, so be sure to check there too!
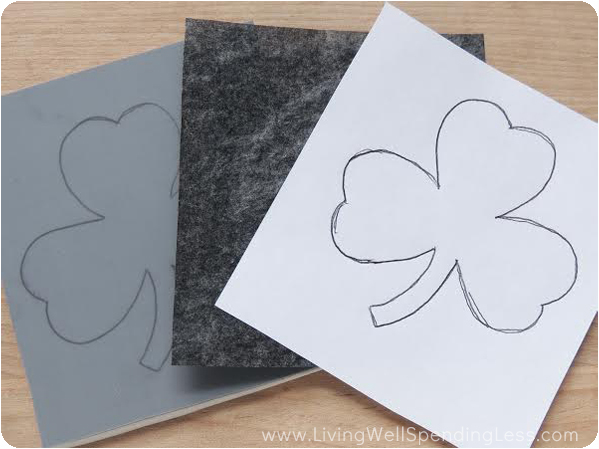
Step 1: Transfer your design of choice on to your linoleum block backwards. To accomplish this, I simply taped my design to a window upside-down such that when I looked through the window the image appeared backwards. From there, I traced my backwards design onto another piece of paper.
To transfer my now-backwards design onto my linoleum block, I placed graphite transfer paper between my block and my design and outlined my design one more time (shown above). Doing so leaves a faint graphite outline of your backwards design on your linoleum block that you can go over with a pencil to make clearer.
Note: If you prefer not to use graphite paper, you can also try drawing your design directly onto the linoleum.
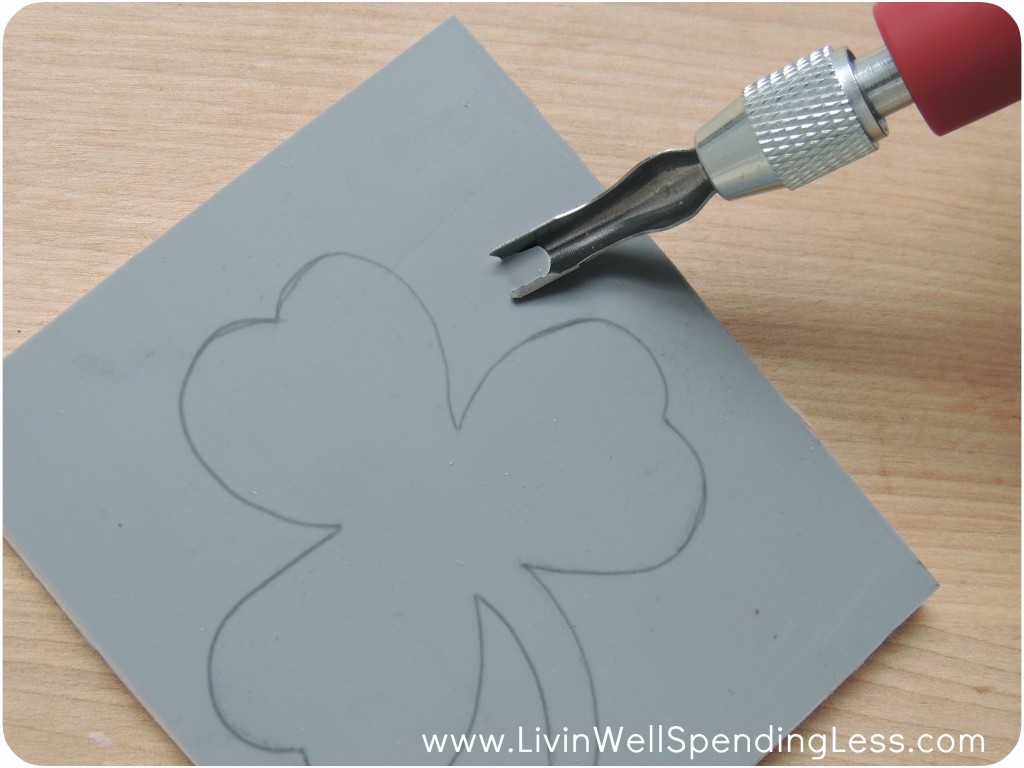
Step 2: Bust out your linoleum cutter and start carving! The linoleum cutter kit I purchased came with a variety of blades, some with more of a U shape and some with more of a V shape. I used the more U shaped blades for removing large chunks of linoleum and the more V shaped blades for cutting more precise edges and outlines.
I started out by removing the excess portions of linoleum around my design with my U shaped blade, as shown above. This is my favorite part of the project, because you can just carve away without worrying about it being perfect.
Please note: The blades on the cutting tool are sharp! This is not a project for young children or anyone struggling with fine motor skills. Always cut the linoleum away from your fingers to avoid a poke!
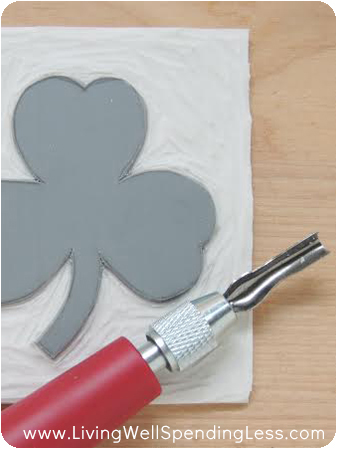
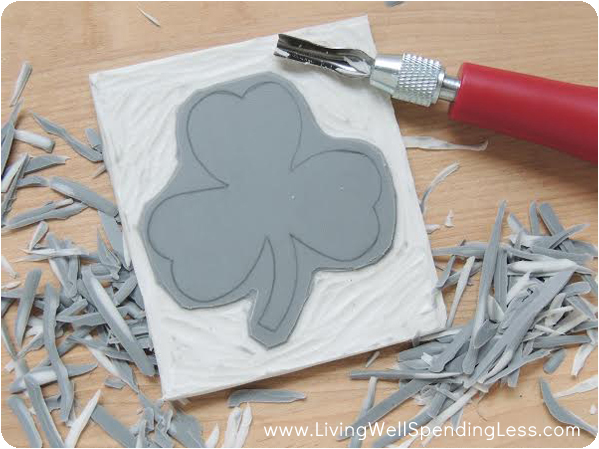
Step 3: I then used my larger V shaped blade to cut around the edge of my design, and my smaller V shaped blade to carve my way into the crevices of the clover.
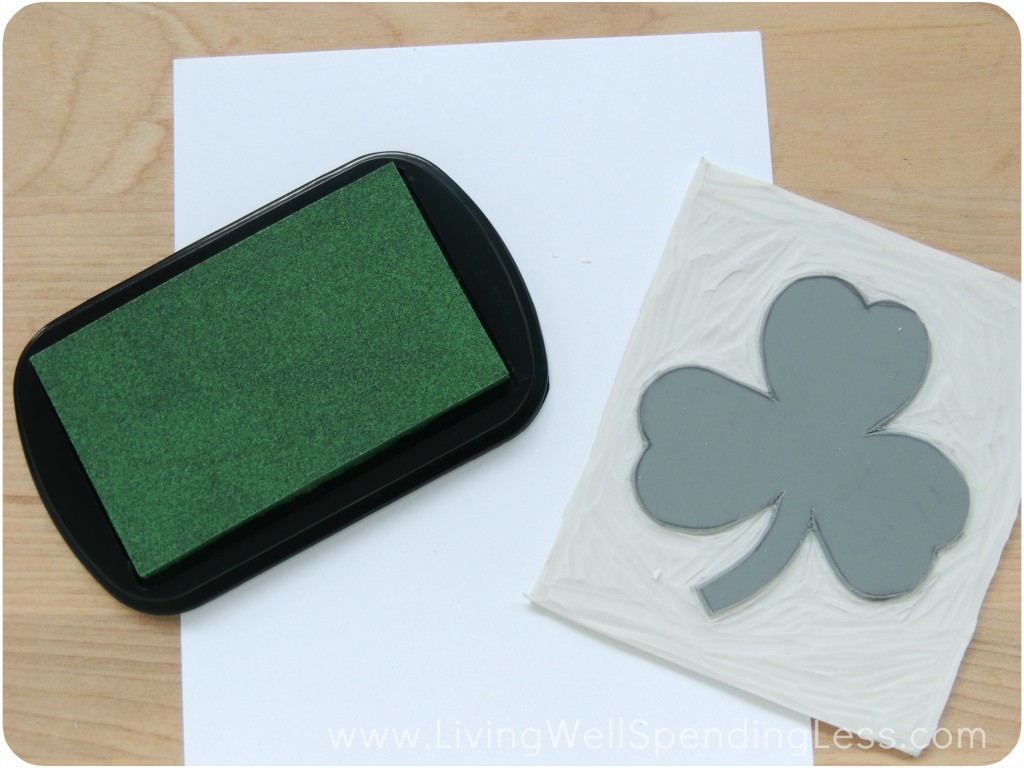
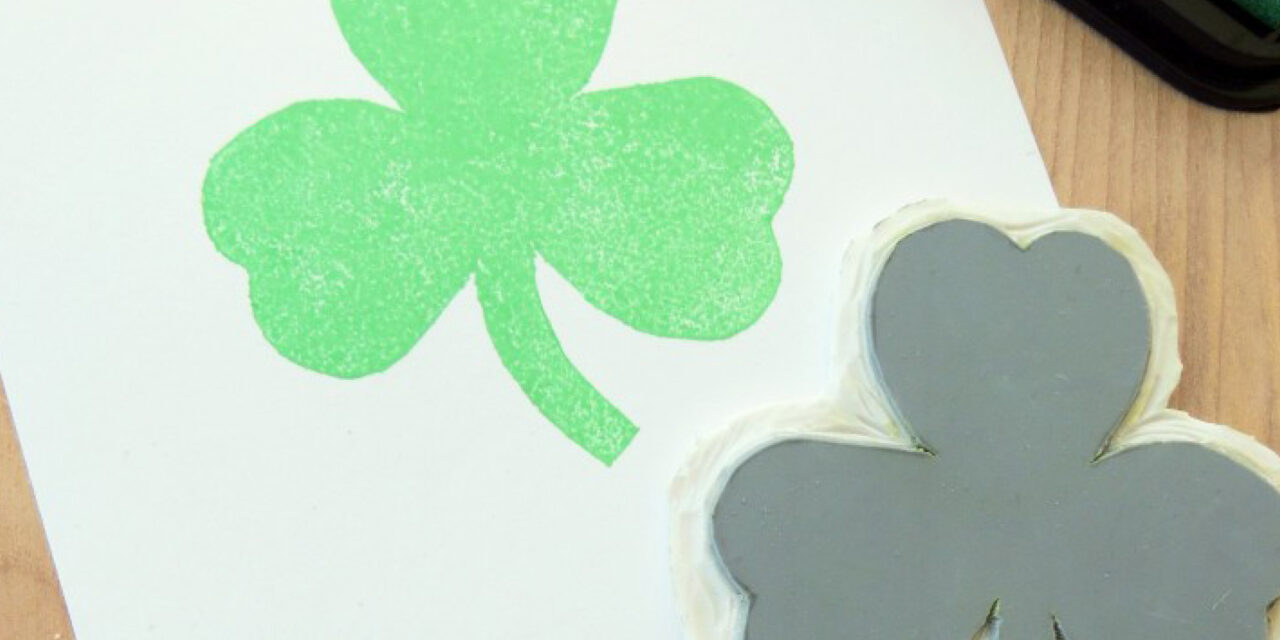
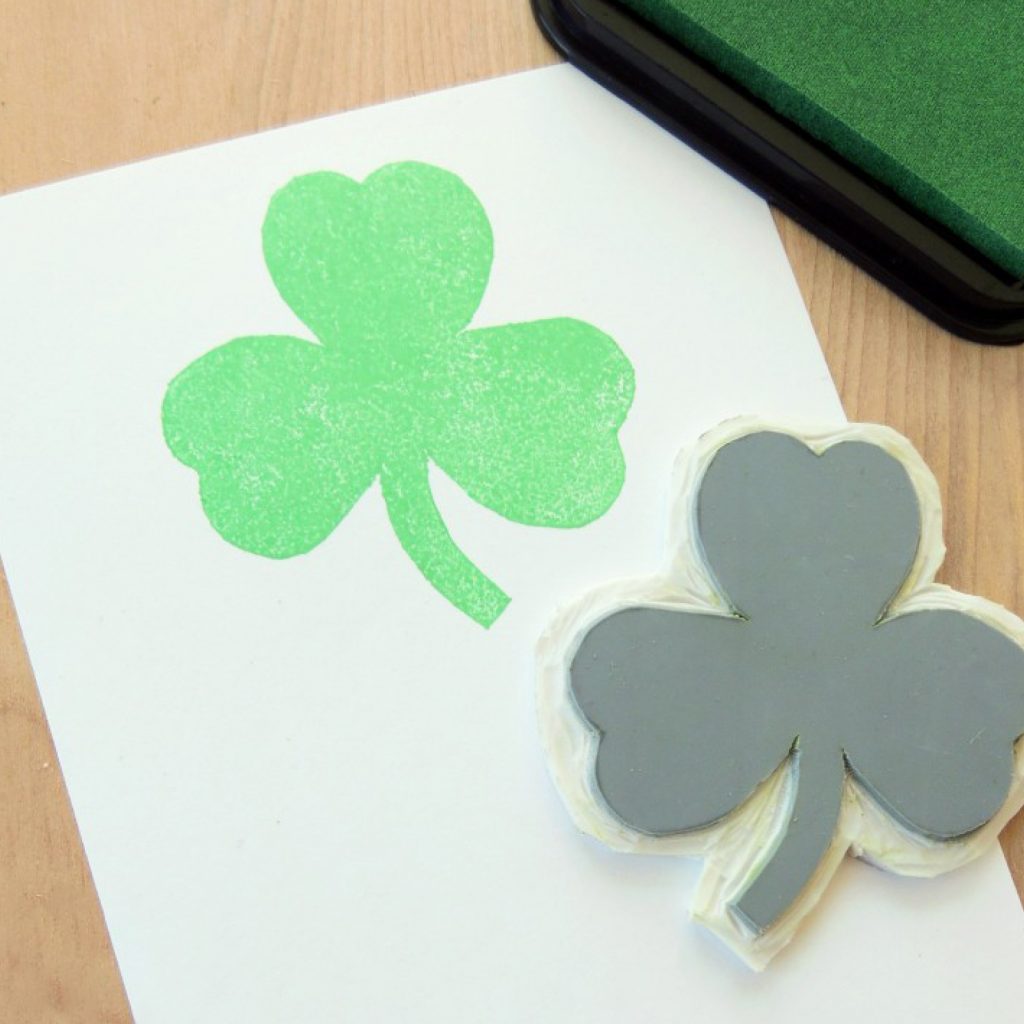
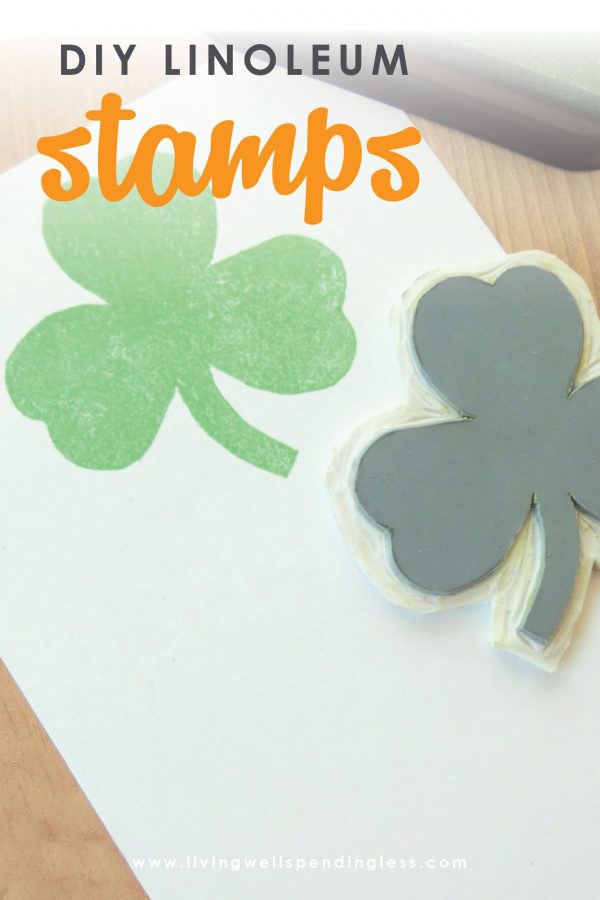
Step 4: You’re now ready to stamp away with your custom-carved design! While not necessary, you may want to trim the edges of your stamp (the white portions shown above) down around your design or even affix your linoleum block to a block of wood or thick plastic to make stamping easier. I also found that my stamp got a better ink when I dabbed my ink pad onto the stamp instead of the other way around.
It’s as simple as that! I used my stamp to create a simple St. Patrick’s Day inspired stamped stationary set, but the sky is really the limit when it comes to what you can create. This would be great for creating custom invitations for a birthday party or wedding, or even for creating personalized handmade stationary sets to give as gifts.
Gabby Whitaker of Mom Makes Joy is a DIY/Craft/Lifestyle Blogger from Phoenix, Arizona. After moving to Boston, Massachusetts in the Summer of 2012, she started blogging as a way to share her crafting creations, cooking escapades, and adventures in Boston with friends and family across the country. Some of Gabby’s favorite things include Chai lattes, Downton Abbey, cozy bookstores, Netflix marathons, and of course, blogging!

TAKE BACK CONTROL OF YOUR HOME LIFE
 Ever feel like you just can't keep up? Our Living Well Starter Guide will show you how to start streamlining your life in just 3 simple steps. It's a game changer--get it free for a limited time!
If you love this resource, be sure to check out our digital library of helpful tools and resources for cleaning faster, taking control of your budget, organizing your schedule, and getting food on the table easier than ever before.


I remember doing these in high school too. I loved it!