
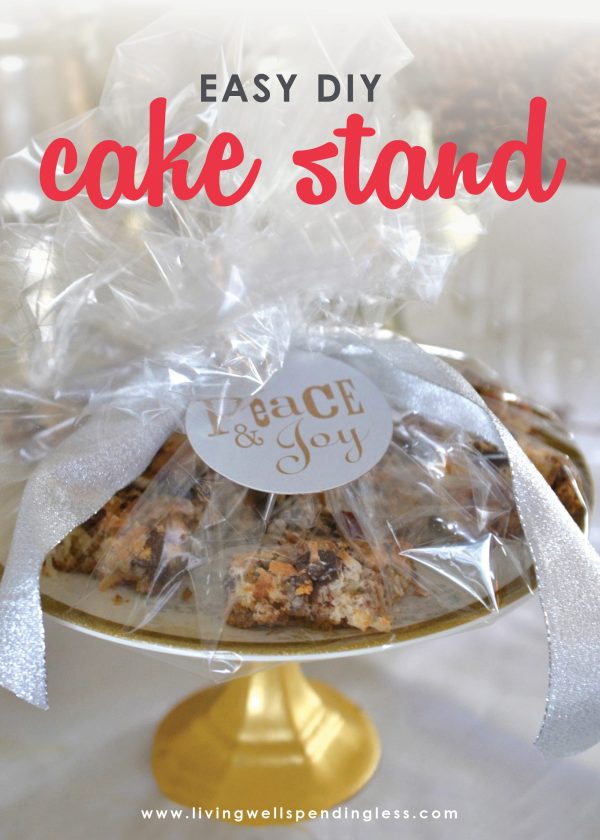
Need an inexpensive gift idea for teachers, neighbors, or friends? This easy DIY cake stand comes together with Dollar Tree items and is so cute!
I first tried making my own cake stands for my daughter Annie’s let them eat CAKE party earlier this year. They were so easy that I thought it would be a fun way to deliver holiday goodies this year. It was another great project for my girls to help with and they were received to rave reviews. After all, who doesn’t love receiving a cute plate full of yummy goodies?
It was one of those projects that needs to be done in stages to allow for drying time, so be sure to allow yourself a couple of days to complete it! We used some cute sparkly gold & silver snowflake melamine plates we found at Target, but you could use any sort of plate for this project–vintage plates from the antique store or Goodwill would be super cute as well! You could also skip painting the candlestick to make the project go a little quicker. Any cookie or bar recipe will do, but we chose 7-Layer Dream Bars because they are our favorite and the girls love making them “by themselves.”
For the holidays you might consider making our Graham Cracker Peppermint Bark or our traditional Homemade Peppermint Bark. Both are super easy and make great gifts.
Easy DIY Cake Stand

Here is what you will need:
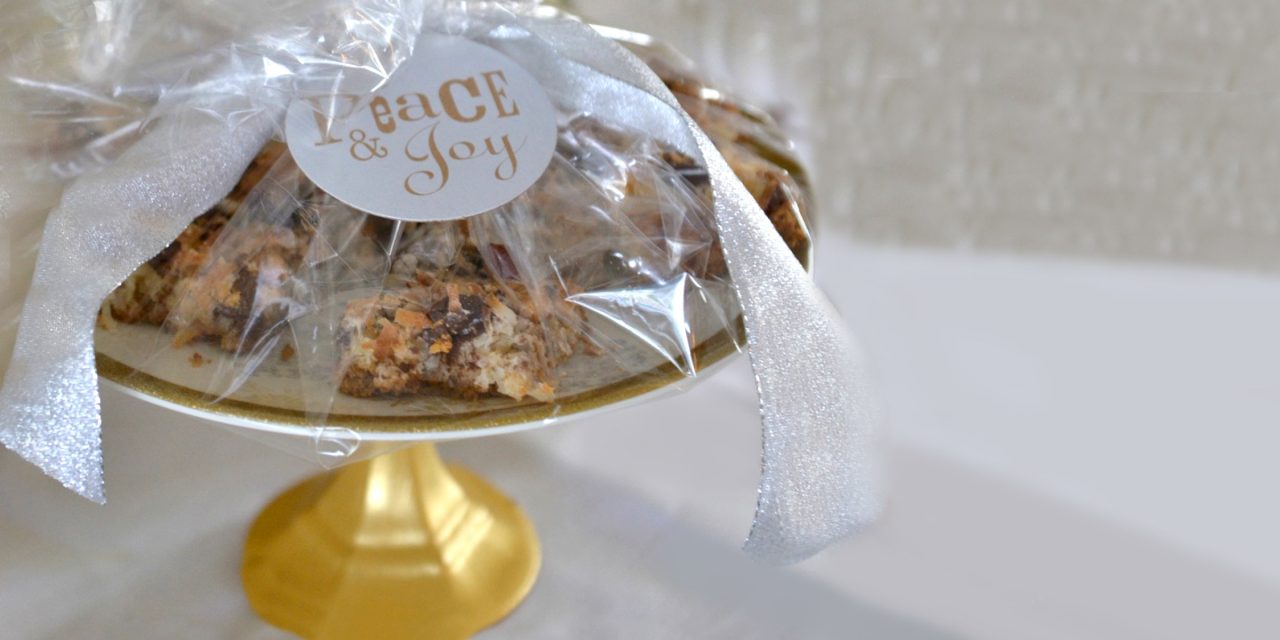
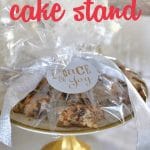
Holiday plates (We got our cute gold & silver snowflake ones at Target for $1.99 each) Glass candlesticks (from the dollar store) Martha Stewart Metallic Paint (or any kind that works on glass) paint brush E-6000 industrial strength adhesive (get it at Home Depot) 7 Layer Dream Bars (recipe below) Clear Cellophane (from dollar store) Ribbon & gift tags 
We started by painting our dollar store candle sticks with the Martha Stewart metallic paint (we had it leftover from another project.) The girls tended to glop it on a little thick, so I helped them smooth it out. It required 3 coats to cover completely.


Once the final coat of paint was finally dry, we glued the bottom of the plates to the top of the candlesticks, following the instructions on the tube of E-6000 adhesive. I then carefully weighed down the candlesticks with a stack of plates and let them dry for 24 hours.


After the plates had dried, we made our 7-Layer Dream Bars. You can get the recipe here, but feel free to use it as a rough guideline–we don’t really measure any of the ingredients. The girls just sort-of throw everything on top and I try to even it out as best I can. They always turn out delicious!

After the bars have cooled completely, cut them into squares and arrange them on the plate. Cut a small slit in the bottom of a square of cellophane, then place the candle stick through the middle so that the plate and bars are covered in cellophane. Secure with a ribbon and a cute gift tag.
Other DIY projects you can do:
PIN FOR LATER:

Ruth Soukup
Latest posts by Ruth Soukup (see all)
- Stop Worrying About Money - July 19
- How to Fit In More Fitness - April 28
- The Most Powerful Decision You’ll Ever Make - April 27
TAKE BACK CONTROL OF YOUR HOME LIFE
 Ever feel like you just can't keep up? Our Living Well Starter Guide will show you how to start streamlining your life in just 3 simple steps. It's a game changer--get it free for a limited time!
If you love this resource, be sure to check out our digital library of helpful tools and resources for cleaning faster, taking control of your budget, organizing your schedule, and getting food on the table easier than ever before.


So cute, Ruth!! Do you know if that glue will hold up pretty well with washing? Sounds pretty strong! I was just curious if it had ever come up. I tend to hand wash my cake plates anyway.
Hope you guys had a fabulous Thanksgiving!! 🙂
xo, Claire
Yes that glue is super strong! The ones I made in May are good as new and I use them quite a bit. I do always hand wash them though–don’t know about the dishwasher!
Thanks so much, this will come in handy for my Holiday party!
LOVE these!