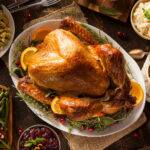
Stress Free Turkey
Stressed about Turkey? Help is here! Use this detailed, step-by-step tutorial to walk you through preparing the most perfect moist and juicy roast turkey from start to finish, including the stuffing and the gravy to serve with it.
Ingredients
For the Turkey
- 1 12-20lb Frozen Turkey We tend to like Butterball. It's the best.
- Real Mayonnaise Make sure it's regular, not light!
- 1 tsp salt
- 1 tsp seasoned salt
- 1/2 tsp black pepper
- 1 tsp garlic powder
- 1 medium yellow onion cut into wedges
- 1-2 tsp flour
- 1 Reynolds Turkey bag
- 1 roasting pan use a disposable one if necessary!
- 1 Electric knife for carving highly recommended!
For the Stuffing
- 1 bag Pepperidge Farm Herb Seasoned or Cornbread Stuffing
- 5 TBSP butter
- 1 large yellow onion
- 4 celery stalks
- 1 9oz. package sliced mushrooms optional
- 2-3 cups chicken broth or stock
For the Gravy
- ⅓ cup turkey drippings these come after the turkey is cooked!
- ½ cup flour
- 2-3 cups chicken broth
Instructions
-
Thaw your wrapped turkey in the refrigerator--give it 1 full day for every 4 pounds, so 3 full days for a 12 pound Turkey or FIVE full days for a 20 pound turkey. Be sure to place a plate, tray, or dish underneath it to keep it from making a mess!
-
Preheat oven to 350 degrees. Make sure to move the racks to make room for your turkey.
-
Prep your bird. I'm not gonna lie--this is the icky part of the whole process. (I usually make my husband help because it grosses me out!) Remove the neck & giblets from inside the turkey, then rinse the entire bird and pat it dry with paper towels.
-
Cook veggies for stuffing. Chop your onion & celery, then melt 5 tablespoons of butter in a large frying pan over medium-high heat. Cook the onion & celery for 3 minutes, until softened, then add mushrooms and cook an additional 5-7 minutes.
-
Prep your stuffing. In a large bowl, combine cooked veggies with stuffing mix, then add in broth until stuffing is nicely moistened.
-
Prep your oven bag. Shake flour inside oven bag and place bag in roasting pan. Place onion wedges inside bag.
-
Stuff your turkey. Stuff both the neck and body cavities, allowing 1/2 to 3/4 cup of stuffing per pound. Don’t pack it too tightly, as it may cause uneven cooking. Once turkey is stuffed, return the legs to the original tucked position if they were untucked for stuffing. Turn the wings back to hold the neck skin in place, which will help stabilize the turkey in the pan and while carving.
-
Season your turkey. Rub generous amounts of mayonnaise all over the entire outside of your turkey. Mix together seasonings, then rub into turkey.
-
Place turkey in bag. Carefully slide the bird into the prepped bag, making sure the opening of the bag is facing the end of the roasting pan, and not facing up. The bag should be inside the pan, not hanging over the edges of the pan. Close with provided tie, then cut six 1/2 inch slits in the top of your bag.
-
Roast your turkey. Your roasting time will be determined by the size of your turkey. Remember to follow the time instructions provided with the oven bag, NOT the turkey, as the bag shortens your roasting time.
Here are the recommended cooking times for STUFFED turkeys cooked in a bag:
• 2-2.5 hours for 10-12 lb turkeys
• 2.5-2.75 hours for 12-16 lb turkeys
• 2.75-3 hours for 16-20 lb turkeys
• 3-3.5 hours for 20-24 lb turkeys
-
Remove turkey from oven. Your turkey is done when your meat thermometer shows 180 degrees in the thigh, 170 degrees in the breast, and 165 degrees in the stuffing. Be sure to cook until it is fully done! Once the turkey is out of the oven, it will need to sit for about 20 minutes before you can start to carve it. This is your time to make the gravy and heat all your other side dishes so that everything is ready at the same time!
-
Remove stuffing. Carefully scoop out stuffing into oven-proof serving bowl. Cover and place in oven with other side dishes to keep warm until serving time.
-
Get drippings. Carefully spoon out 1/3 cup of turkey drippings from inside the turkey bag and place in medium saucepan.
-
Make gravy. Heat your drippings over medium heat; whisk flour into pan drippings until it forms a paste. Gradually blend in your broth, a little at a time, whisking continually until smooth. Reduce heat to low and simmer for five minutes, stirring continually, until gravy reaches desired thickened. If too thick, add more broth. If not thick enough, add more flour. Salt and pepper to taste. Transfer to gravy boat. (NOTE: If the gravy stresses you out, you can also heat a jar or two of ready-made gravy in a pan, whisk in some turkey drippings for extra flavor, then salt & pepper to taste. No one will know the difference!)
Carve Your Turkey-This is easiest done with an electric knife.
-
For the breast: Beginning halfway up the breast, slice straight down until the knife reaches the cut above the wing joint, at which point the slice should fall free on its own.
-
For the drumsticks: Cut the band of skin holding the drumsticks, then grasp the end of the drumstick, place your knife between the drumstick/thigh and the body of the turkey, and cut through the skin to the joint. Remove the entire leg by pulling out and back, using the point of the knife to disjoin it.
-
For the wings: Insert a fork in the upper wing, then make a long horizontal cut above the wing joint through the body frame.
-
Serve and enjoy! You did it, and now it's time to celebrate!
Recipe Notes
Recipe Notes
1. You may find that your turkey is still a little frozen inside--don't panic. The water will help it to finish thawing fairly quickly. When the ice is cleared in the whole cavity, your bird is ready
2. Remember that you are working with raw poultry, and be careful to contain your mess to one area, then clean that area well before continuing with any other food prep.
3. Some people like to boil their neck & giblets to make broth for the gravy. We don't usually do this, and prefer to use chicken stock instead. If not using for to make broth, just throw the neck and giblets away.