

I’ve been promising to share pictures of my new office for what seems like forever now, so I am pretty excited to finally be able to say my little space is finally finished! This is where the magic happens, folks! 😉
All joking aside, I can’t even begin tell you how great it feels to finally have a space of my own to work in. Our three bedroom house didn’t have any extra space for a separate office, so my previous workspace was smack dab in the middle of our living room. This worked for awhile, but after my husband left his job last April to be the stay-at-home dad, we discovered that a little space is necessary sometimes.
After a few months of frustration, Chuck gently suggested it might be time to find some sort of office space, and in August I found an affordable little space for rent in a downtown building about a mile from our house.
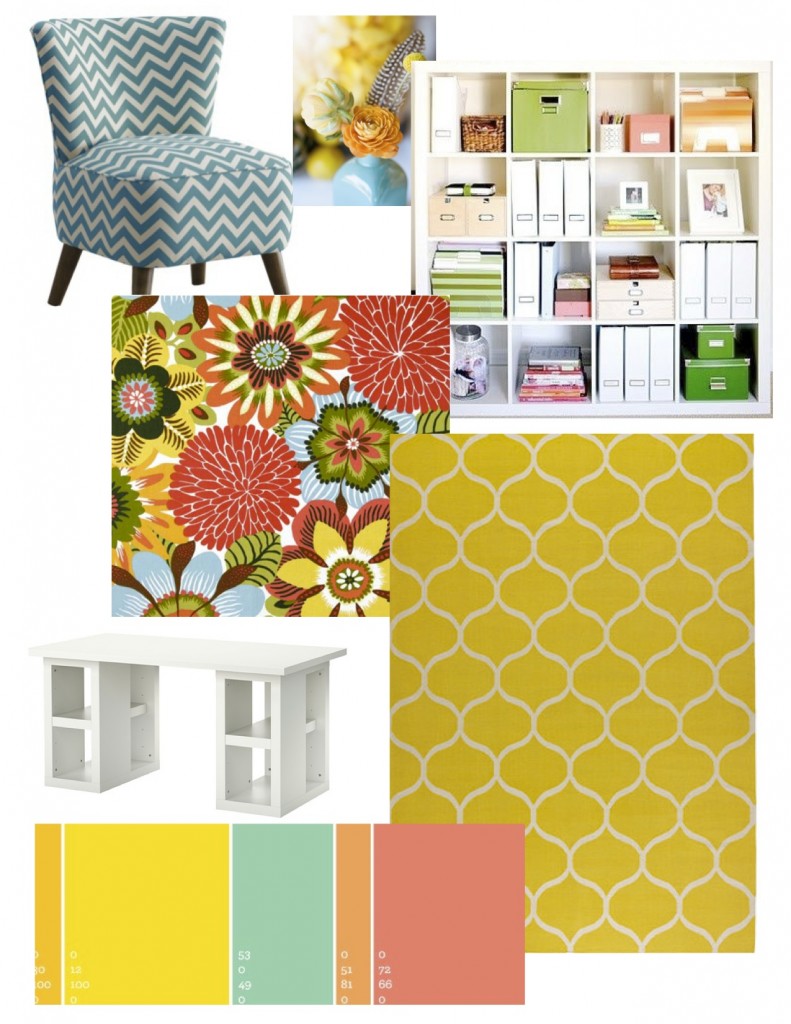
I was excited at the prospect of making a space totally my own, but also overwhelmed by the cost of purchasing a whole room full of furniture. The first thing I did was create an inspiration board of ideas for how I wanted my space to look:
I didn’t have time to search endlessly on Craigslist, so I did the next best thing: I took a little trip to IKEA! Because the space was fairly small (and since the closest IKEA is almost 2 hours away) I first made a floor plan to scale (okay, Chuck made me a little floor plan to scale–sometimes it is nice being married to an engineer), then made templates for the furniture I was thinking of getting. (The measurements are listed online) Once I was sure it would all fit, I made a list and headed to IKEA. It was pretty daunting to manage 2 flatbed carts full of furniture all by myself, but with a little help from a few very nice employees, I managed to get everything I needed loaded into my trusty Tahoe. All in all, I think spent about $750 at IKEA on 2 desks, a printer cart, a supply cart, a bookcase, 3 bookshelves, a desk chair, curtain rods, a file cabinet, a wall clock, and some picture frames.
Of course the main reason all that furniture is so affordable is that you have to assemble it yourself! Yikes! It was quite the project and another reason I am grateful to have such a handy husband! My assistant Kalyn’s awesome husband pitched in to help with the assembly as well, which made it go a lot faster!
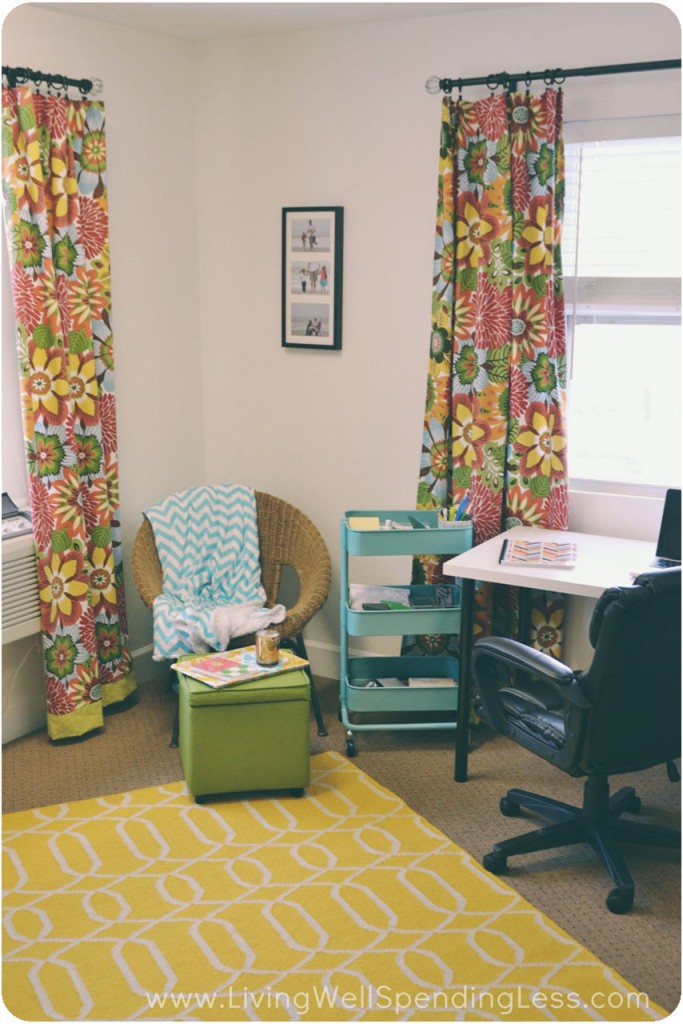
With the furniture in place I was ready to accessorize, and truthfully that is the part that took me awhile. I fell in love with this Robert Allen Kiki Piñata fabric after seeing it on Pinterest and knew I wanted it for my curtains. I whipped up one set in no time flat, but the second set took me almost 5 months to finish! The gorgeous rug I got from Overstock.com was one of the most expensive parts of the whole project at just over $200 (no longer available in the 5×8 size), but it covers up most of the ugly brown carpet and makes the room such a bright and happy space that it was worth the splurge.
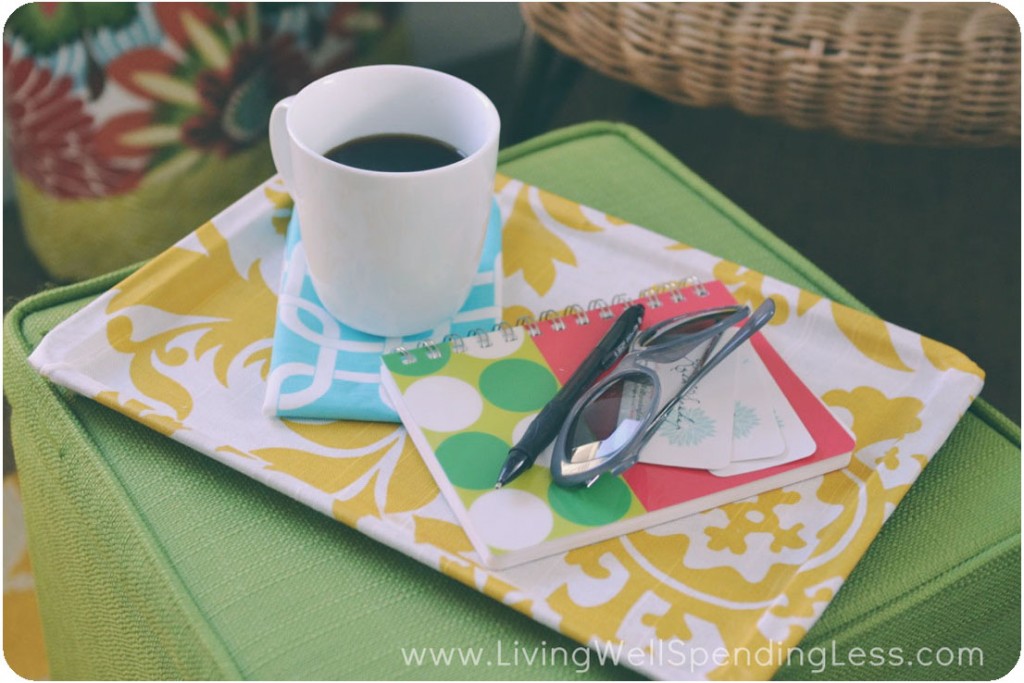
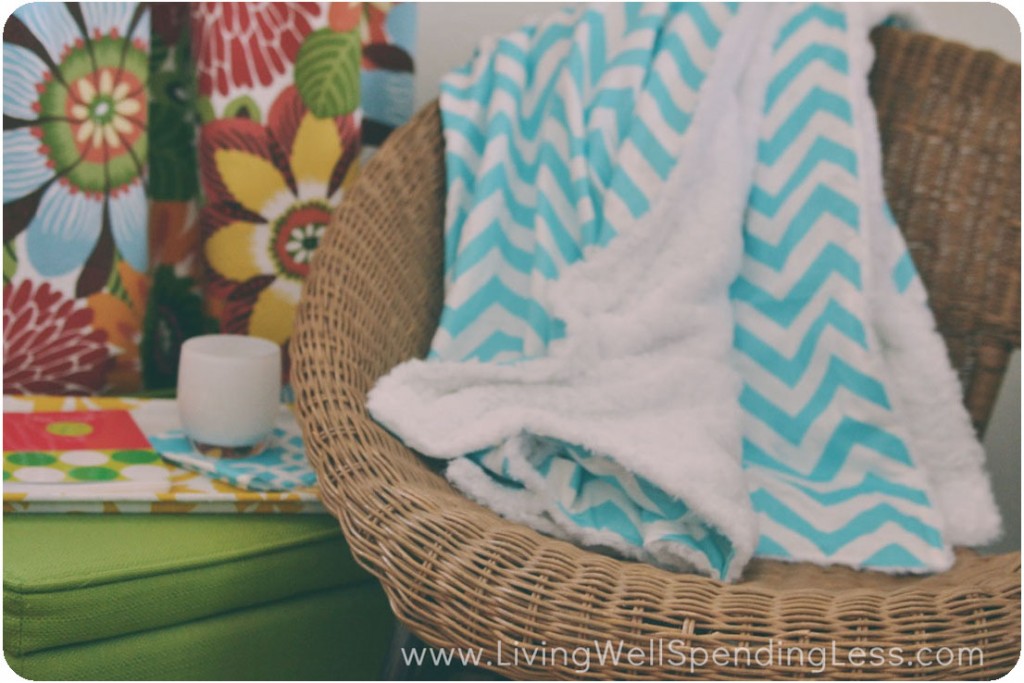
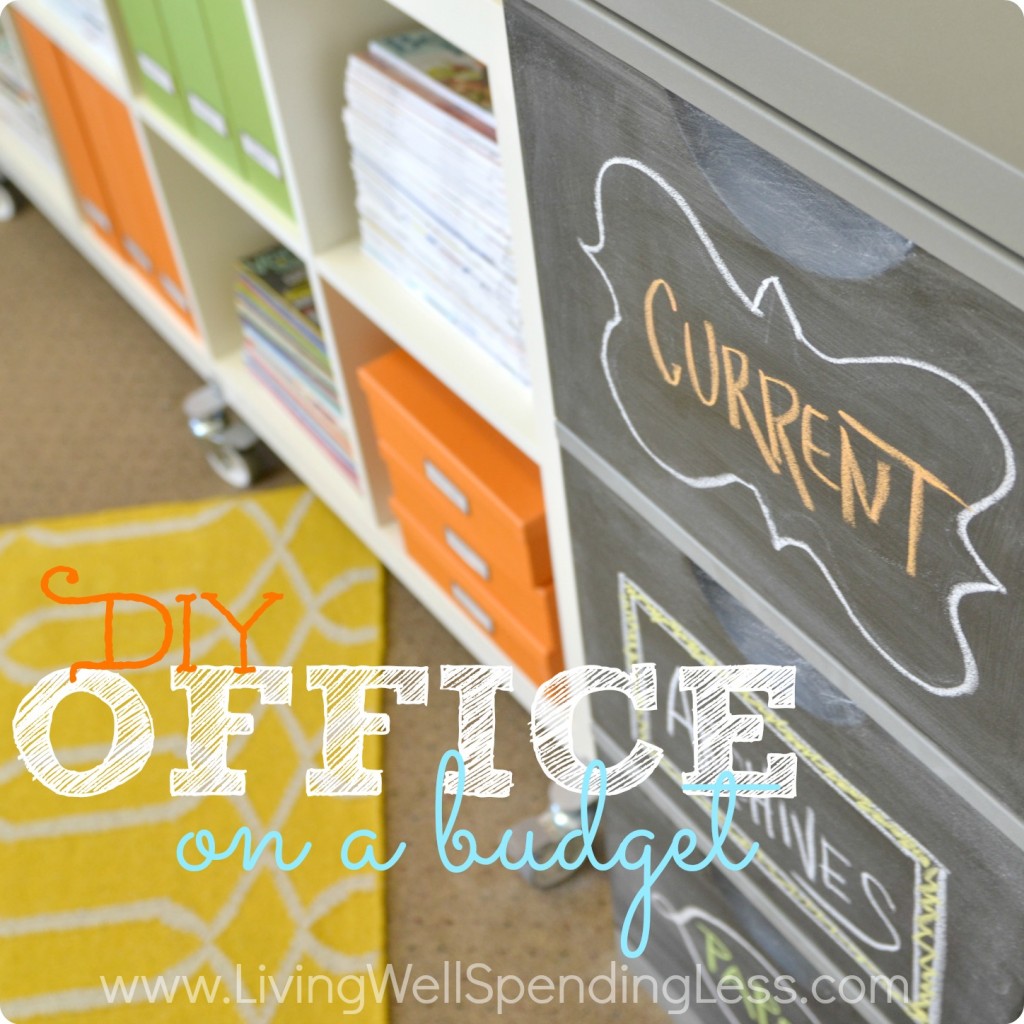
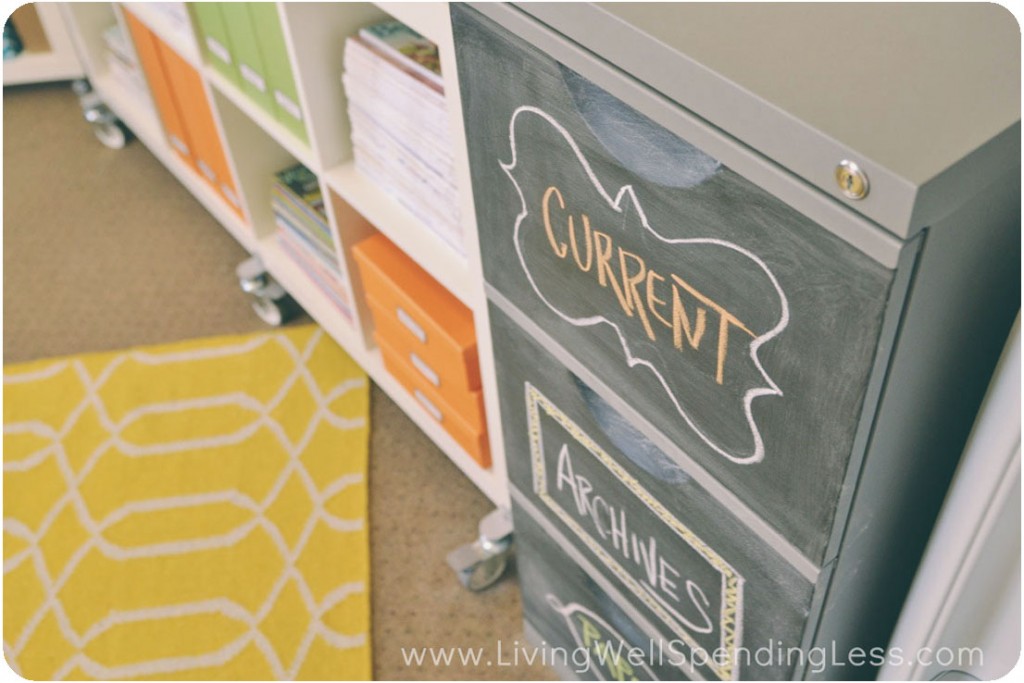
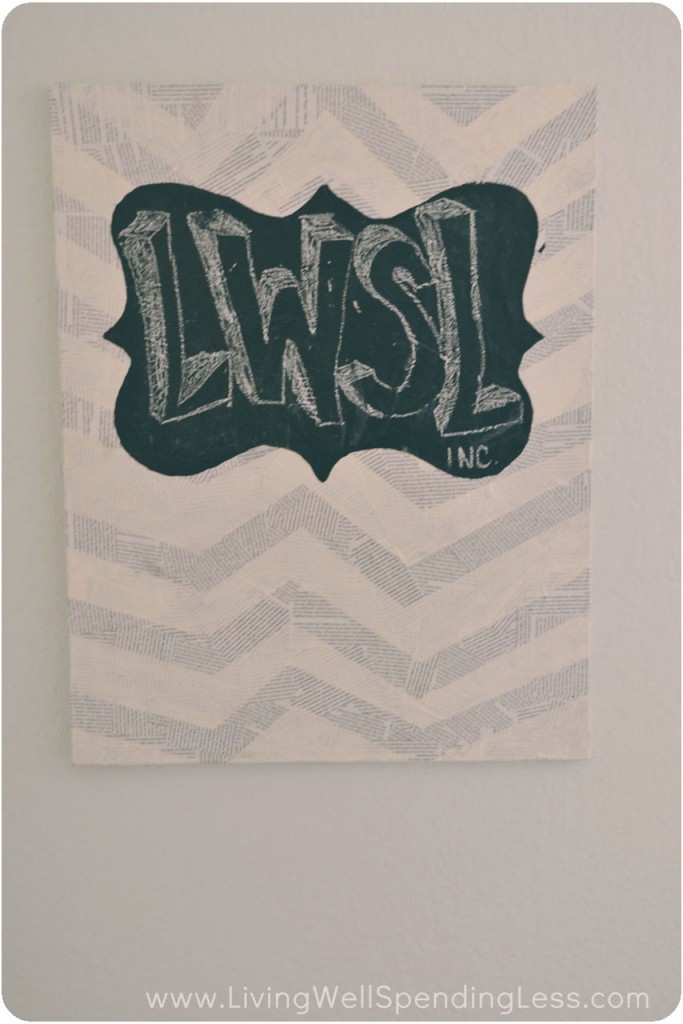
Other DIY projects for the space included sewing a cozy chevron minty throw, (which has gotten a lot of use on cold mornings), and making a fabric covered tray to accent the ottoman. I also painted the fronts of my file cabinet with chalkboard paint, which turned out really cute! For the bulletin board, I simply used spray adhesive to attach fabric to an old cork board, then covered the whole thing in Mod Podge and painted the frame.
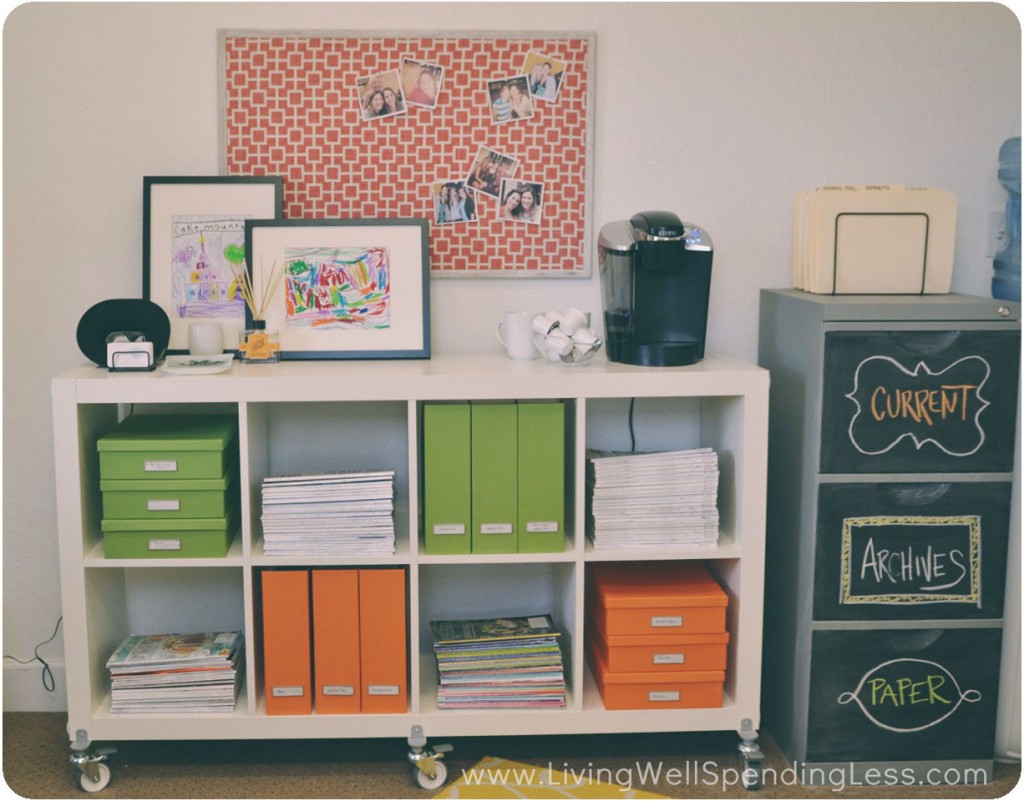
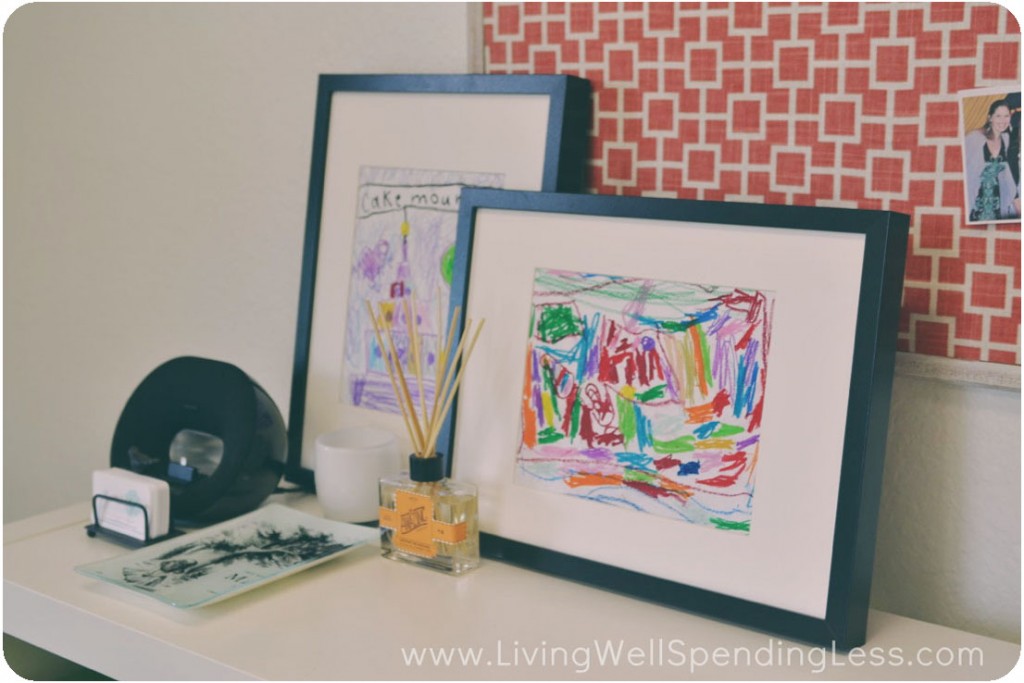
My girls each colored me a picture for my new office using oil pastels and I loved them so much I ended up framing them in my IKEA frame. I also found a space to hang my chevron chalkboard wall art!
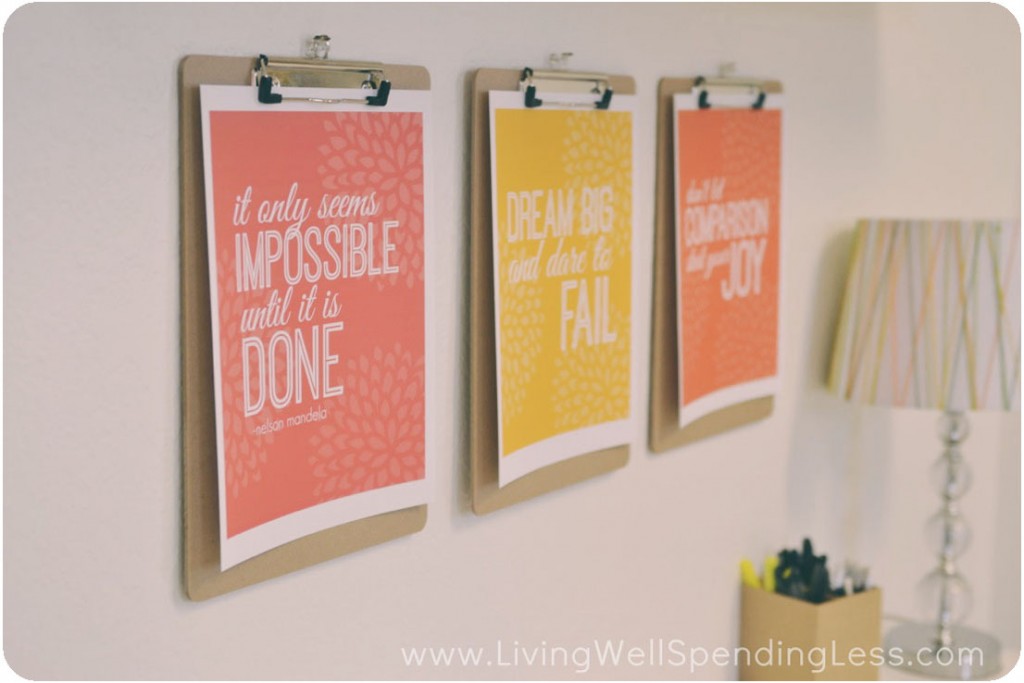
To jazz up the second desk space I created some cute motivational printables, then clipped them to inexpensive clipboards for some very cheap and easy wall art.
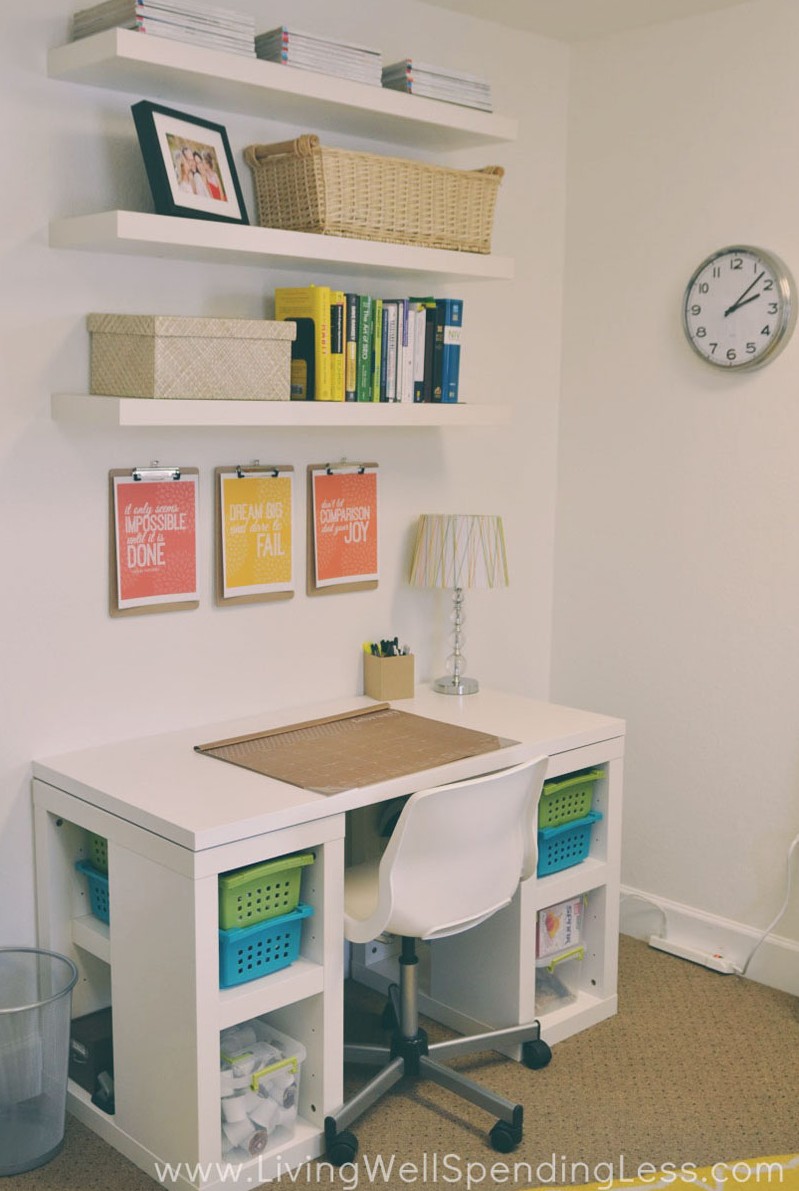
The lamp and desk calendar were both found on clearance at Target, the orange and green boxes were purchased (on sale) at the Container Store, and the other accessories & furniture were gathered from around my house. Overall, I spent about $1200 on furniture, fabric, and office supplies.
* * *What are your best budget decorating tips?
TAKE BACK CONTROL OF YOUR HOME LIFE
 Ever feel like you just can't keep up? Our Living Well Starter Guide will show you how to start streamlining your life in just 3 simple steps. It's a game changer--get it free for a limited time!
If you love this resource, be sure to check out our digital library of helpful tools and resources for cleaning faster, taking control of your budget, organizing your schedule, and getting food on the table easier than ever before.


Greate pieces. Keep writing such kind of info on your site.
Im really impressed by it.
Hello there, You’ve performed a great job. I will definitely digg it and
in my opinion suggest to my friends. I’m confident they’ll be benefited from this website.
Can you please tell me which desk you purchased? I saw you said that you bought two of them but I only see the one. I really like the open shelves on the bottom and floating shelves on the wall!
My spouse and I absolutely love your blog and find a lot of
your post’s to be exactly what I’m looking for. Would you offer guest
writers to write content available for you? I wouldn’t mind writing a post or elaborating on some of the subjects you
write related to here. Again, awesome web site!
Classified ads may charge property viewing fees or application fees for properties that
aren’t on the market. There are numerous companies that offer Lansing
party rentals depending upon your requirements. You could
deduct the mortgage interest as a rent expense.
Love this office! You have so many creative ideas and prove that it is not necessary to spend a bundle to do it! Bravo!