

Is your refrigerator looking a little dirty? It may be time to deep clean your fridge! Keep your fridge squeaky clean with this step-by-step guide.
Our refrigerators might possibly be the most overlooked area in our home when it comes to cleaning. Constantly in use, this essential appliance doesn’t usually get a second thought. Whether we just don’t think about it at all, or assume that because food is kept cold or rotated through, that the fridge stays relatively clean, the truth is that cross-contamination, spills, splashes and all sorts of disgusting things I’d rather not talk about can spread throughout the fridge in this perfect storm of moisture, food, dirty hands and frequent use.
In other words, a messy fridge is a health hazard.
But that’s not the only problem.
Believe it or not, a messy fridge is also costing you money. When our refrigerators become so full that we can no longer find anything, we are in serious danger of wasting a lot of food, from forgotten leftovers hidden behind the milk to produce that goes bad before we remember it is there, to condiments that have been expired for years still taking up space.
And it’s not just the food waste taking a bite out of your budget. Surprisingly, your fridge can increase your energy bill by a LOT. Peak efficiency requires plenty of air circulation, clean coils, and clean seals that are tight and working properly. You can boost the efficiency of your fridge and lower your energy costs simply by keeping things clean.
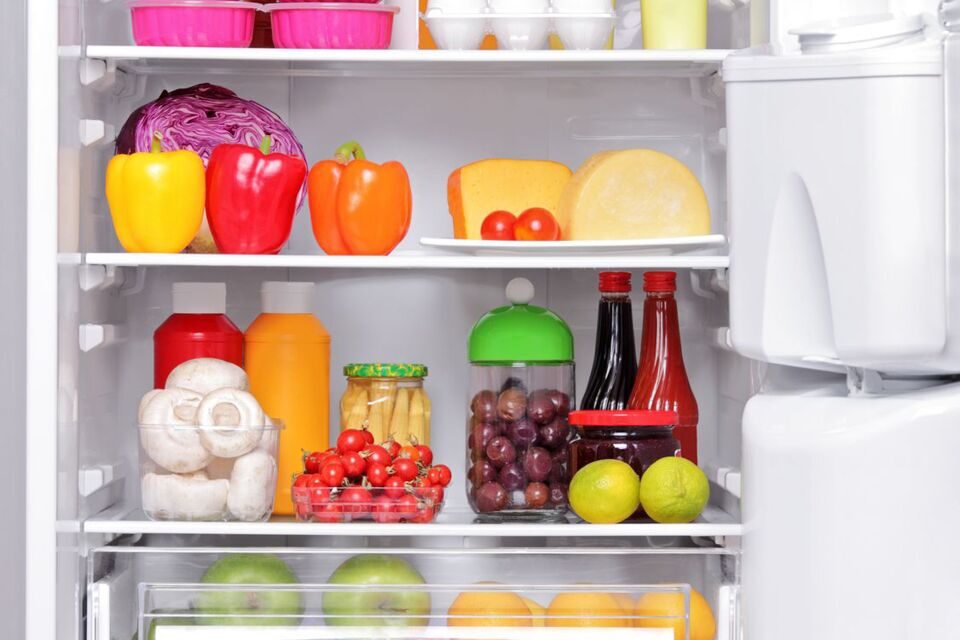
If it’s not already, your refrigerator should definitely be added to your regular cleaning list. Your weekly fridge duties should include wiping down the surfaces, disinfecting the door handle, and carefully rotating food as it gets older to prevent spoilage. Food should be properly stored in covered, clear glass containers that can be easily identified and cleaned. Wipe off lids, put a paper towel under items that are likely to drip, and pay attention to dates and ages.
Even so, at least a few times a year, you may still need to dive in and really deep clean your refrigerator. (Dum dum dum…) And while that may sound scary, I promise it is not as bad as it seems!
How to Deep Clean Your Fridge
With a little prep and this easy-to-follow plan, you can get it done in less than an hour. Here is what to do:
1. Gather your supplies
Here is what you’ll need:
- Old towel for floor
- Bucket with baking soda and water (2 TBSP to 1 QT water)
- Paper towels or rags
- Multi-purpose surface spray
- Butter knife or putty knife
- Trash bags
- Cooler
- Vacuum
2. Prepare
Be sure the fuse or circuit breaker to the outlet is turned off, then unplug the fridge. This ensures your safety any time you’re using water around appliances. You may also want to be sure that you put down a towel to protect floors from any spills (especially if you have wood flooring in the kitchen).
3. Remove food
Place items in the cooler. Check dates on everything and toss anything that’s expired. Be merciless with your purging. If it’s close to the date and your family will never use an entire bottle of pickle relish that you purchased for ONE recipe six months ago—toss it out.
4. Remove shelves and drawers
Over a towel, wipe each shelf carefully with the water/baking soda solution (it absorbs odors). For stubborn crusties, use a butter knife or putty knife to gently loosen the gunk.
5. Soak
Start shelves and drawers soaking in a sink or empty Rubbermaid bin filled with more water and baking soda. This will help to really get everything clean. While they’re soaking…
6. Wash inside of fridge
Use your spray or a cloth dipped in the cleaning solution. Thoroughly wash the built-in fixtures, the bottom of the fridge, and the nooks and crannies of the door. Be sure you get in the cracks and under the shelving. Your butter knife may come in handy again here to get in some of the cracks where crumbs and food particles tend to collect.
7. Dry inside with a cloth
Make sure the inside is fully dry and clean before replacing the shelves and bins. You should wipe each bin dry with a soft cloth or paper towel.
8. Clean the door seals/gaskets
One of the grimiest areas of the fridge is the door seals. They have little folds that can collect debris, crumbs and at the very worst, grow mildew and mold. Be sure to clean them very thoroughly and dry impeccably. This will prevent mildew and keep the seal tight and working at maximum efficiency.
9. Vacuum the grate/kickplate and coils
Carefully pull the fridge out from the wall and vacuum the coils to remove any dust that may have collected. Carefully remove the kickplate or grate from the bottom of the fridge as well, and do the same. Some fridges (particularly if the freezer is side-by-side or on the bottom) may have a drip tray or pan. If this is the case, remove the tray and clean as you would the shelves, then replace.
10. Replace items in the fridge
Take care to secure each lid and wipe the tops and anything sticky, before putting it back in the fridge. Put items like meat and seafood on the bottom to protect any spills from spreading. I like to put a folded paper towel in the drawers and under liquids (milk, juice) to absorb condensation and keep things extra clean. Add an open box of baking soda to absorb odors.
11. Remove frozen items
Most freezers these days don’t need a defrosting, just a simple cleaning will do. Due to the perishable nature of freezer items, you must work quickly when you organize the freezer. First, remove items and store in the cooler. Check expiration dates. Anything you don’t immediately recognize and anything with ice crystals or freezer burn on the inside (I’m looking at you, half-container of ice cream)—get rid of it! Check things that are frozen in a solid mass, such as vegetables or fruit. This is an indication that they’ve been thawed and refrozen, so they should be discarded, due to food borne-illness concerns.
12. Wipe the inside of the freezer
Wipe it all out just as you did in the fridge. This is usually a much faster job, but be sure to wipe baskets and shelving carefully.
13. Discard ice
Wash ice cube trays and replace the ice with fresh water.
14. Replace items in freezer
Organize like-items together, stack boxes and keep less-perishable items like frozen vegetables in the door. Move meats and fish to the back and on the bottom.
To recap, here are the steps to deep cleaning your fridge and freezer:
- Gather your supplies
- Prepare
- Remove food
- Remove shelves and drawers
- Soak
- Wash inside of fridge
- Dry inside with a cloth
- Clean the door seals/gaskets
- Vacuum the grate/kickplate and coils
- Replace items in the fridge
- Remove frozen items
- Wipe the inside of the freezer
- Discard ice
- Replace items in freezer
Taking care to organize your fridge and deep clean it every season can ensure you have plenty of extra storage space. You’ll save money because you won’t be re-buying things you didn’t realize you had buried in the back of the fridge. Plus, your fridge will work more efficiently and be more cost-effective.
Most importantly, though, having a clean fridge will help keep your family healthy and safe!
PIN FOR LATER


Ruth Soukup
Latest posts by Ruth Soukup (see all)
- Stop Worrying About Money - July 19
- How to Fit In More Fitness - April 28
- The Most Powerful Decision You’ll Ever Make - April 27
TAKE BACK CONTROL OF YOUR HOME LIFE
 Ever feel like you just can't keep up? Our Living Well Starter Guide will show you how to start streamlining your life in just 3 simple steps. It's a game changer--get it free for a limited time!
If you love this resource, be sure to check out our digital library of helpful tools and resources for cleaning faster, taking control of your budget, organizing your schedule, and getting food on the table easier than ever before.


The glass in the shelves in my refrigerator cannot be removed, so it actually CAN’T be thoroughly cleaned. I’d like to know if if this design flaw is common to refrigerators, and if there’s anything that can be done.
Linda, if you can’t remove the shelves. You can still take all items out of fridge and wipe down shelves with war soapy water.
we are providing similar services at your doorstep https://kaamkebande.com/blog/cleaning/5-best-fridge-odor-absorber/ you can visit our website