
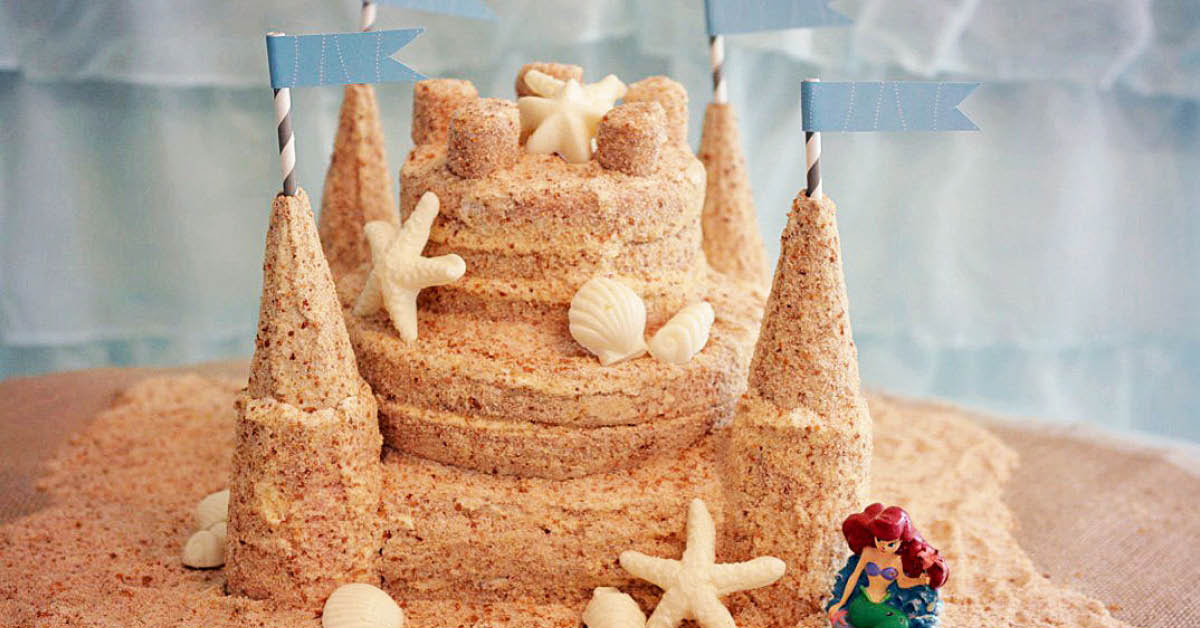

Looking for the cutest beach-themed birthday cake? Here’s a super simple step-by-step tutorial on how to make a sandcastle cake that will be a show stopper.
Oh, the cake!
I knew as soon as we decided on a mermaid theme for Annie’s 4th birthday that a sand castle cake would be perfect. I had seen a few really photos on Pinterest, I just couldn’t find any detailed instructions. Since paying hundreds of dollars for a professionally decorated cake was out of the question, I decided to go with plan B: wing it!
I kinda prefer plan B anyways. 😉
Let me just start by saying that I am not a professional baker, or even anything close to it, but what I lack in technical skill I make up for with sheer determination. I’m not going to lie, this cake took forever and a day to make. It was truly a labor of love. But, when all is said and done I was so happy I put in the time because it truly was the focal point of the entire party. Luckily I already had most of the cake ingredients already on hand.
Now, a word about cakes. I am not a professional baker, but I do love to bake. After trying lots of from-scratch cake recipes, I decided that boxed cake mixes are much easier, the texture is often better, and they taste just as good. However, the frosting makes HUGE difference! I almost always make this homemade cream cheese buttercream frosting for my cakes. It is super easy and SO much better than the store-bought stuff!
How to Make a Sandcastle Cake
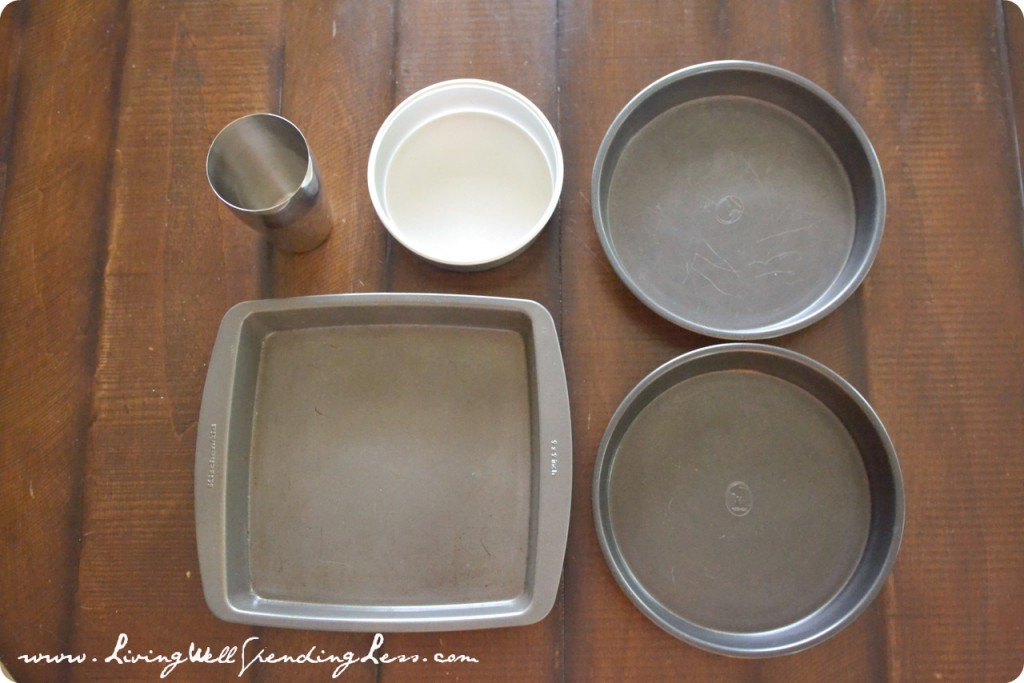
 Here is what you need:

Step 1: Make the white chocolate seashells & starfish. This is a very easy process! Simply melt the candy melts in the microwave per the bag instructions, then place melted chocolate into a decorating bag, cut off a small hole at the tip, and pipe into the molds. Place in refrigerator to harden for 15-20 minutes, then pop out of the mold. I found that one bag of melts was enough to exactly fill my starfish mold and seashell mold 1 time each.

Step 2: Toast coconut for the sand mixture. Preheat oven to 350 degrees, then lay out several cups of coconut on a baking sheet. Toast in oven for 10-12 minutes until coconut is completely golden brown, stirring several times throughout the process to ensure it is toasted evenly.

Step 3: Make “sand” mixture. Place 2-3 packages graham crackers, toasted coconut, and several cups of white or brown sugar (I used white to get a lighter sand) into a 12 cup food processor and process until mixture resembles a fine sand.

Step 4: Begin making cakes according to the box directions. This process will take a while since you will have to re-use the same pans multiple times. Be sure to grease and flour your pans VERY well each time, especially the cocktail shaker.
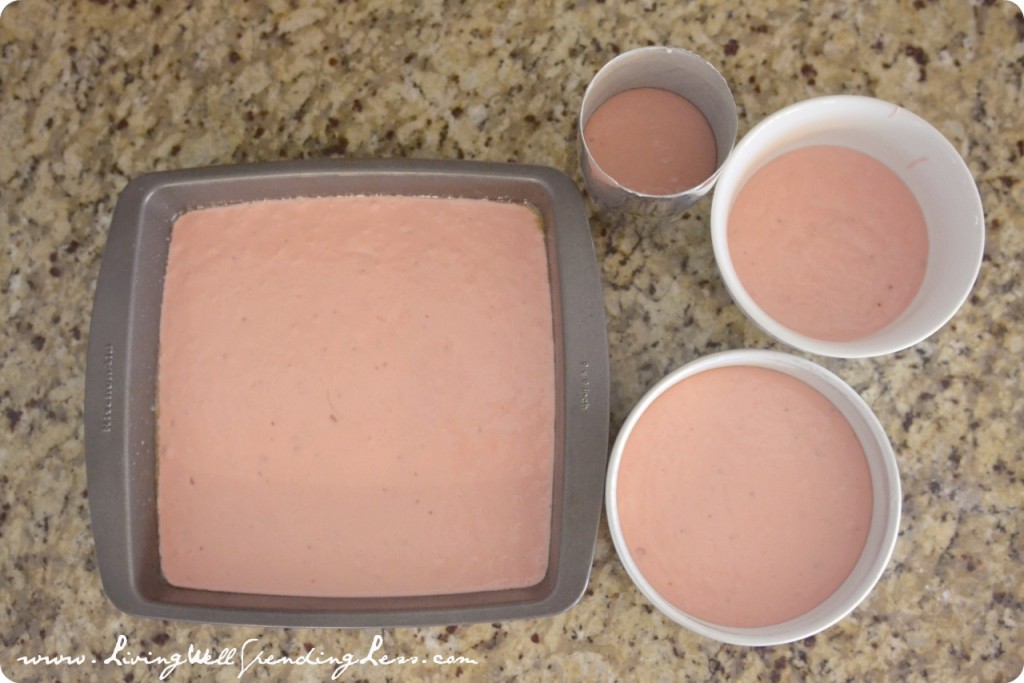
Tip: Before baking, tap each cake pan firmly on counter several times to release any air bubbles. This will improve your cake’s texture and help it to bake flatter!

Step 5: Let all your cake layers cool completely; refrigerate if desired to make them firmer and easier to work with.

Step 6: Make your “turrets” and “battlements” out of sugar cones and marshmallows. First, cut the tip of the cone with a sharp knife enough so that the flags will fit in the hole. Next, smooth frosting over the cone and roll in “sand” mixture until it is completely covered. Repeat process with marshmallows. Set aside or refrigerate until needed.

Step 7: It is almost time to start assembling your cake, but first you need a base! Cut out a piece of cardboard in a rounded wavy rectangle as shown.

Step 8: Make your “towers.” Cut the bottom of your cooled and chilled cocktail shaker cakes so that the stand up straight. Roll in sand mixture, much like you did with the sugar cones and marshmallows. I found this was easiest to do by sticking a few skewers through the tower so I had something to hold on to. Be sure to get the top as well!

Step 9: It is finally assembly time! If all went according to plan, you should have 3 square layers for your base. Level the layers with a cake leveler if necessary, then place the first layer on your cardboard base, add a thick layer of frosting, the add the second layer, followed by more frosting and the third layer. Frost most of the top and the sides, then carefully add “sand” so that it sticks to the frosting. The goal is to get the whole cake covered with sand.

Step 10: Level the two 8″ round cakes if necessary. Lay the first cake flat side down on top of square cakes. Spread a thick layer of frosting, then add the second 8″ cake flat side up. Spread sides and top edges with frosting, then once again cover the frosting with sand mixture.

Step 11: Repeat this process with the three 6″ round layers. For that section, I found it easiest to assemble the three layers on the counter, then frost and roll the sides in sand like with the tower pieces. Once the top 6″ round layer is in place, push some skewers through the top of cake through all layers to add extra stability, then frost and sand the top of the cake.

Step 12: Once the entire cake has been frosted and sanded it is time to add the towers to the four corners. Use the cocktail shaker to cut out each cake corner, then spread frosting over exposed cake pieces and press tower into place. Add a dollop of frosting to the top of the tower to secure turret in place, and push straw flag through the cone into cake so it stays in place. Cover any cracks or exposed frosting with sand.

Step 13: Add the battlements to the top of the cake by placing a toothpick in each one and pressing into place.

Step 14: Add the finishing touches to your cake! Use the seashells and starfish to embellish the top and sides, then, when the cake is in place on the table, use remaining sand to cover the cardboard and make the cake look like it is sitting in a patch of sand. Your guests–and your guest of honor–will be blown away!
 tutorial for making a darling sandcastle cake. Perfect for a beach or mermaid themed party, or even a casual beach wedding!")


Want more? Don’t miss these helpful posts!
- How to Plan a Party in 48 Hours
- 7 Secrets to Throwing a Fabulous Party on a Budget
- How to Make a Paper Party Hat
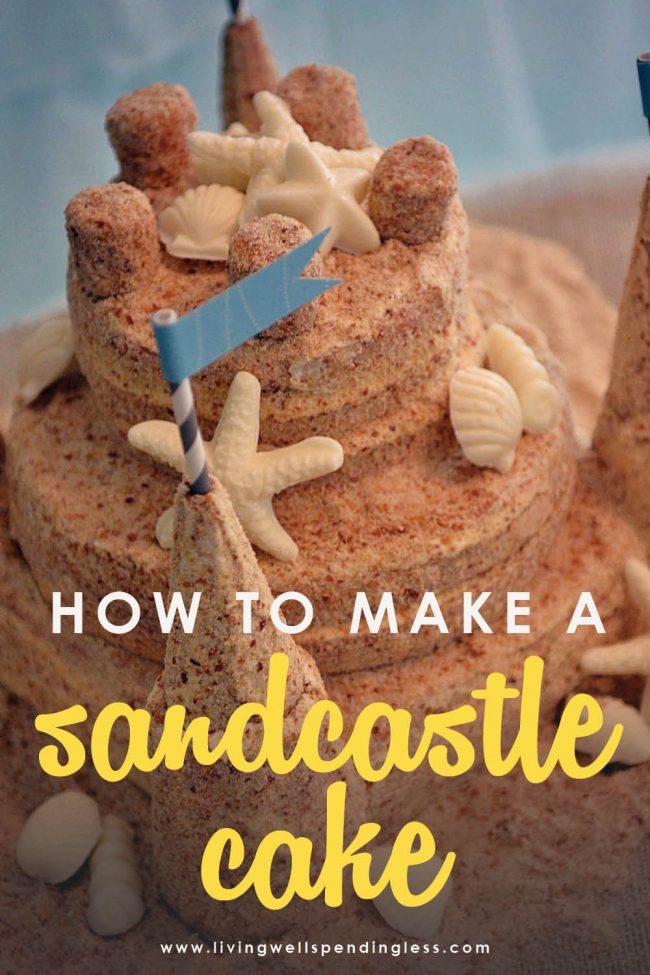
PIN FOR LATER

Ruth Soukup
Latest posts by Ruth Soukup (see all)
- Stop Worrying About Money - July 19
- How to Fit In More Fitness - April 28
- The Most Powerful Decision You’ll Ever Make - April 27
TAKE BACK CONTROL OF YOUR HOME LIFE
 Ever feel like you just can't keep up? Our Living Well Starter Guide will show you how to start streamlining your life in just 3 simple steps. It's a game changer--get it free for a limited time!
If you love this resource, be sure to check out our digital library of helpful tools and resources for cleaning faster, taking control of your budget, organizing your schedule, and getting food on the table easier than ever before.


Thanks for sharing your full table of all your goodies. I loved your oysters with a pearl! Having done themed parties and teas, it’s good to get more ideas. I’m sure your daughter LOVED her cake and other goodies.
In the process o f making this for Saturday. Any tips on cutting this cake?
I’m having a hard time finding the paper flags. Do you remember where you got them?
I made the paper flags out of scrapbook paper and paper straws. 🙂