

Love the look of mercury glass? This DIY mercury glass tutorial will have you tempted to transform every piece of clear glass in your home!
Hi there! I’m Claire! I am so tickled to be here at Living Well Spending Less, today. I have followed along with Ruth for over two years now, so this is such a treat! I am also super excited to share this easy DIY Mercury Glass tutorial. Just like Ruth, I too love easy and budget-friendly ideas and this one definitely fits that bill!
There are so many Mercury Glass projects out there all over Pinterest and and I have always wanted to try it myself . I actually cannot believe I waited so long – it’s just really “stupid easy” but… the caveat is this:
WARNING {danger, danger!}: Making your own mercury glass is HIGHLY addictive! You might just be tempted to transform every piece of clear glass in your house so, please. Proceed with caution. 😉
DIY Mercury Glass
You’ll need the following things to get started:
- “Looking Glass” mirror-like spray paint by Krylon (this is the most expensive part of the project as a can costs about $10 BUT… if you take a coupon to your favorite craft store, you can most likely get it get it for 40-50% off – yay! I actually had a $5 off coupon for Ace Hardware so that is where I purchased mine.
- White Vinegar
- Water
- A clean spray bottle
- Paper towels or a soft rag for blotting
- Clear glass pieces you want to transform (I am a little obsessive about candles so I already had all sorts of things on hand, but you can also easily thrift some clear glass items for .50-$1.00 each)
First, I looked around the house and rounded up my little glass collection.

You want to make sure the items you will be painting are clean and completely dry {clearly I had to wash these after the picture!}.
In the spray bottle, mix 50% water with 50% white vinegar. I used about 1/4 cup of each and that was plenty.
I started with a mini glass “hurricane” – I have at least 20 of these that I bought years ago and I use them for outside parties. You can find something similar at the dollar store.

Now, if you read the directions on the “Looking Glass” spray, it says to spray the INSIDE of the piece. Well {little, redheaded rebel that I am} I bucked THAT whole system after loads of research online and I decided to apply it on the OUTSIDE. Not only is it more manageable to distress but, hello? I’d also like to actually USE these pieces for flowers or candles, etc.
I placed the glass upside down on some newspapers and got ready to go. You want to do one piece at a time since you have to work fast, so have your vinegar solution and {well shaken} “Looking Glass” spray standing by.
Start by lightly misting the glass all over with the vinegar solution. You want little beads, not a runny mess so this was a little bit of trial and error for me too. Immediately spray a very thin coat of “Looking Glass” spray, lightly coating the outside of the glass.
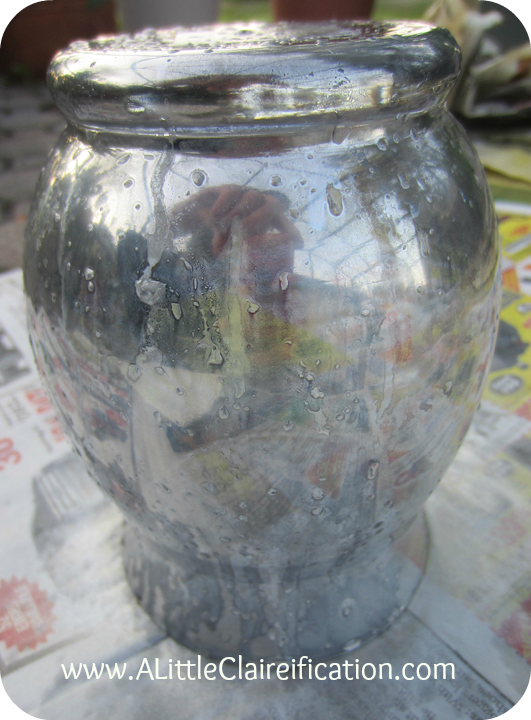
You can see I did have a few drops that were running on this first attempt, but that’s ok. Each piece is going to look very different which is the cool thing about mercury glass. After one minute, lightly blot the glass with a soft rag or paper towel. You can use a light circular motion – I pressed a little harder in some areas to distress the paint. In some spots it even removes the paint, giving it a very worn or crackly look.
I repeated this process three times – mist with the vinegar, spray with”Looking Glass”, allow to set for 30 seconds to one minute and then distress. Wait a minute or two and repeat. I turned my pieces right side up for the last 1-2 coats to cover the lip of each. You can add as many coats as you would like. I stuck with 3-4 on all of my pieces.
Here’s a look at the Hurricanes before and after. Love.

Next up, a random glass vase that was under my kitchen sink. I could not even tell you where it came from but I know I did not buy it so it must have come with some flowers I received at one point. I used the same method, working quickly to distress between coats.

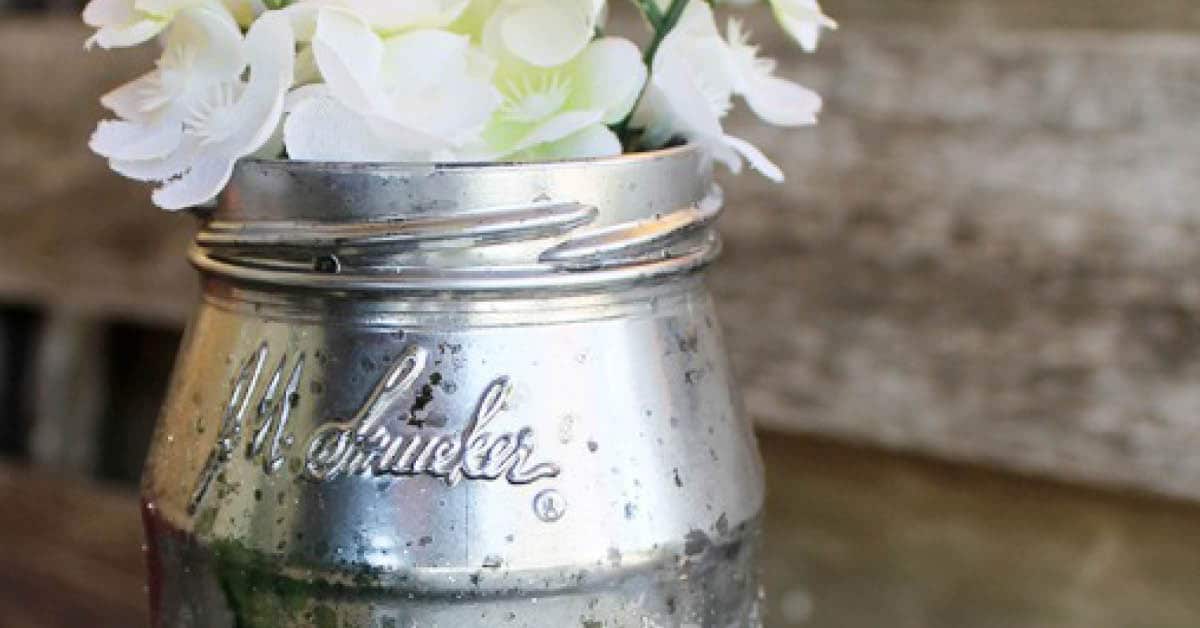
The possibilities are pretty endless! I also used a glass votive and a jam jar since I have been saving those (repeat after me: “I am not a hoarder, I am a crafter.”) But I AM just a smucker sucker for before and afters:

The glass on the votives already had a pattern so I used the least amount of spray on these. Very “Anthropologie” like! And I still have a little “Looking Glass” spray left after these 4 pieces so now I am keeping an eye out for which thing I want to cover next.
I hope you have a chance to try it out out soon – it really is so easy to do! You can find out a little more about me {& my cheese addiction & crazy obstacle course mud run obsession & more} HERE, so come on over and say hello – I would absolutely love to hear about any mercury glass projects you make, or have already made, too.
Thanks so much again for having me over today, Ruth!!
Isn’t that the coolest DiY project ever? I am so excited to try this!! Have you ever made your own mercury glass?
More DIY Projects You’ll Love:
PIN FOR LATER


Claire
Latest posts by Claire (see all)
- How to Make Mercury Glass - April 23
- Easy DIY Bird Feeder - August 11
TAKE BACK CONTROL OF YOUR HOME LIFE
 Ever feel like you just can't keep up? Our Living Well Starter Guide will show you how to start streamlining your life in just 3 simple steps. It's a game changer--get it free for a limited time!
If you love this resource, be sure to check out our digital library of helpful tools and resources for cleaning faster, taking control of your budget, organizing your schedule, and getting food on the table easier than ever before.


Love. Love love this stuff. Just finally found it last week and have been experimenting. While I agree that if you want to use your vase afterwards you have to paint it on the outside. You get a much more mirrored finish by painting the inside. Have you tried baking it afterwards? Ya know like those sharpie on ceramic things? 350 for an hour or two. Ill let you know if it works I’m gonna try myself soon. Plus I wanted to see what it looks like on a glossy ceramic surface. So I took 2 old vases and painted one gloss white and one gloss black. Then sprayed the looking glass. The white looks a bit like pewter. Really beautiful but not he look I wanted. The black is much more mirror like. If you try baking it, please let me know how it turns out. Thanx.
Heya this is somewhat of off topic but I was wondering if blogs use WYSIWYG editors or if you have to manually
code with HTML. I’m starting a blog soon but have no coding skills so I wanted to get advice from someone with experience. Any help would be enormously appreciated!
I am excited to try this, I love mercury glass.I hope to do a lamp but will practice on dollar store vases. Thank you for your clear directions.
Suzie
I would love to try this, however, I cannot find the Looking Glass anywhere here in Canada in Ottawa, Ontario. Does anyone know where I can purchase it? Thanks for your help!
Michele,
I’m not sure if this is too far for you to travel, but the Ace Hardware at this location is a supplier for Krylon Specialty paints. You might try giving them a call and seeing if they carry the Looking Glass mirror-like paint or if they could order it for you?
QUINCAILLERIE CANTLEY
267 MONTEE DE LA SOURCE
CANTLEY, QC J8V 3L4
819-827-3778
Best of luck!
~ Jenn
Sounds easy and looks great.