
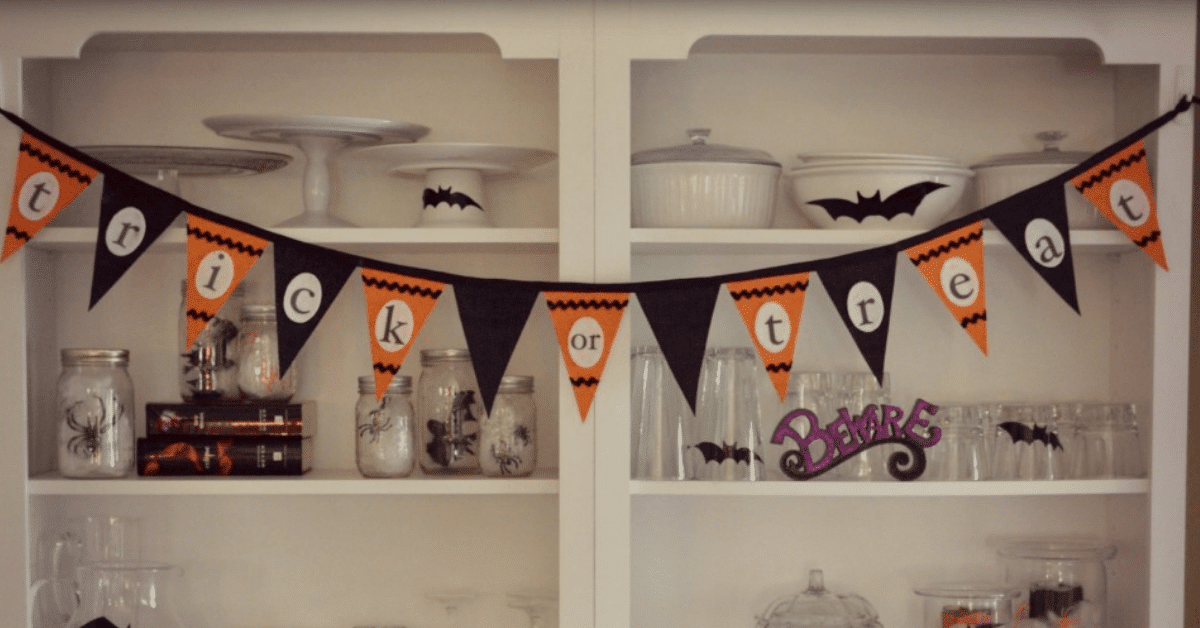

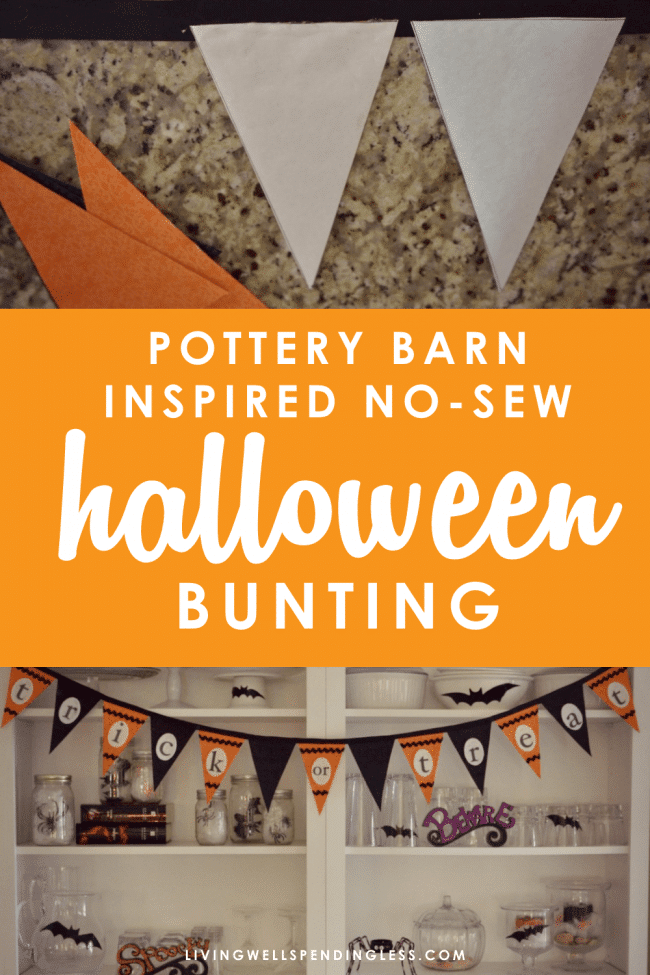
This Pottery Barn Inspired No-Sew Halloween Bunting is just the cutest way to decorate for Halloween on a budget.
Two years ago I spotted a darling little bunting in the Pottery Barn Kids Halloween catalog. Back then, I was just starting out on this little thrifty journey of mine, and as tempted as I was to order it, I decided it would be far more cost-effective to purchase the materials and make my own rather than pay the crazy price they were asking (I think it was around $60 or so.)
So I headed to Jo-Ann’s and picked up 2 fat quarters of orange and black fabric with the best of intentions. And then Halloween came and went and I never seemed to get around to it. Two years passed before I thought about making this super cute bunting, but the thought of sewing all those little triangles and rickrack stopped me every time.
Then I stumbled across this post about ironing freezer paper to fabric to wrap banana bread and I had an epiphany! I could make my bunting without sewing it at all!
And so I did. Here’s how:
Pottery Barn Inspired No-Sew Halloween Bunting

First I ironed 2 pieces of freezer paper to the back of both colors of fabric. I was very careful to make sure there were no wrinkles and that it was stuck down everywhere.

Then, I used my paper cutter to cut a 4.5″ x 7″ triangle template out of card stock. I then traced the triangles onto the freezer paper and cut them out using a very sharp scissors. I cut out 7 orange triangles and 6 black triangles. (I keep one pair of special scissors only for cutting fabrics.)

Starting with the center (orange) triangle, I hot glued the triangles face down onto one half of a 1″ black ribbon, alternating black and orange and working my way to the ends. I then folded over the black ribbon and glued it down to the backs of the triangles.
(Note: Normally, if I were making a paper bunting, I would have sewn the triangles in place and had I not been trying to make this a completely no-sew project, I probably would have done that here. I tend to like the look of the white stitching on the black ribbon.)

Once the triangles were glued in place, I flipped over the bunting and used a thin stream of hot glue to attach the black rick rack to the orange triangles, trimming them to fit with my sharp scissors.

Lastly, I used my word processing program to create letters spelling the words “trick or treat,” then printed them onto some printable iron-on transfer paper I had on hand. I then ironed the transfer paper to a piece of white felt, then carefully cut out the ovals with my sharp scissors and hot glued them in place.
After we hung the bunting my eldest daughter and I decided that we needed to add a few other Halloweeny accents to our hutch to finish off the look, so we scrounged up a few other items from the Halloween bin and around the house, and in the end, even though it didn’t look exactly like the inspiration photo, and even though my husband told me it was WAY too early to put up Halloween decorations, we loved how it all turned out.


So what do y’all think? Have you started decorating for Halloween already? Where do you find your spooky inspiration?
PIN FOR LATER:

Ruth Soukup
Latest posts by Ruth Soukup (see all)
- Stop Worrying About Money - July 19
- How to Fit In More Fitness - April 28
- The Most Powerful Decision You’ll Ever Make - April 27
TAKE BACK CONTROL OF YOUR HOME LIFE
 Ever feel like you just can't keep up? Our Living Well Starter Guide will show you how to start streamlining your life in just 3 simple steps. It's a game changer--get it free for a limited time!
If you love this resource, be sure to check out our digital library of helpful tools and resources for cleaning faster, taking control of your budget, organizing your schedule, and getting food on the table easier than ever before.


This is so cute! I’d love to pin the image but it won’t let me. None of the images with the cute bunting on them will allow me to pin them.
This is so adorable! It looks great! Thanks so much for sharing!
I’m hosting an It’s Fall Y’all ~ Linky Party. I would love for you to share this, and any other Fall projects you have! Hope to see you there 🙂
Oh, it’s darling!! My goal was to do one of those for my niece’s wedding shower…um….that was in July. 😉 Now my goal is to do one for the fall. 😉 ISn’t the freezer paper on fabric the best thing ever? Yours is as good as PB!