
Welcome back to the Beginner’s Guide to Cleaning! So far in this series we have addressed the “why” and the “when” of cleaning,taking an honest look at the reasons having a clean house even matters to us, as well as creating a workable cleaning schedule that fits with our own needs. Then, last week, we also took a look at the “what” of cleaning—those cleaning products and tools we may need to get the job done.
But this is the week we will finally start getting our hands dirty….and our houses clean. Each week we will methodically make our way through one area at a time, starting today with our living space—the most visible and most highly trafficked rooms in our home. The good news is that after this week’s assignment your house will look and feel a whole lot cleaner. The bad news is that this week’s assignment is probably the biggest of this whole series. But wouldn’t you rather get the hard part over with first?
The format for this portion of the series will be pretty simple. I will walk you through the steps for cleaning the surfaces most commonly found in this zone, giving detailed instructions for how to clean each one. If you are a seasoned house-cleaner, much of it may be review—feel free to skip to the end of the post, or add your own tips & tricks in the comments below! At the end of the post you will get a printable checklist to use as you tackle your living space.
Are you ready? Good! Then let’s get started.
Step 1: Pre-clean & create a collection zone
Supplies needed: A large box or basket or individual baskets for each family member like this seagrass stair basket, but you could use whatever you have around the house, or even build a pretty box out of scrap wood.)
How-To: Pick up any items lying around the living area, including any clutter that has collected on tables or shelves. Throw away garbage or papers that are no longer needed. Place remaining items in appropriate baskets for each family, or collect in a single basket to be put away. (This is a great task for kids while you are cleaning the room!) Consider creating a permanent collection zone somewhere in your home—either at the front entrance, near the stairs, or in a corner of the living room. Use your basket or baskets to collect any items that would normally get left lying around. If mail & paperwork is normally a problem, create a 2nd collection zone specifically for items that need to be kept (but try to throw away junk mail & catalogs as soon as they come in!)
Step 2: Clean Ceiling Fans, Vents, Lights & Upper Ledges
Supplies needed: Vacuum with hose attachment, hand vacuum, or portable wet dry vac, warm soapy water, rag or sponge
How-To: Vacuum excess dust from top of fan and/or upper ledges. Use wet rag to gently clean blades; rinse and repeat if necessary.
Step 3: Wash Windows
Supplies needed: Glass cleaner, squeegee, rag
How-To: Spray glass; run squeegee against glass from side to side, wiping blade with rag as necessary.
Step 4: Clean Curtains & Blinds
Supplies needed: washing machine, iron & ironing board, duster, mild soapy water & rag
How-To: If curtains are washable, remove curtains and wash in cold water on permanent press. Tumble dry on low and remove while still very slightly damp. Iron and re-hang. If curtains are dry clean only, consider having them cleaned or spot clean with mild soapy water. For blinds, dust gently with dusting wand until all dust is gone. If necessary, spot clean gently with a wet rag and mild soapy water.
Step 5: Dusting
Supplies needed: Reusable or disposable dusting wand or dusting mitt.
How-To: Run duster over all horizontal surfaces, including bookshelves, the tops of light switches and fixtures, picture frames, clocks, mirrors, and any knick knacks or figurines.
Step 6: Clean & Polish Wood Furniture
Supplies needed: Murphy’s Oil Soap, Furniture Polish, rags
How-To: Fill sink or bucket with warm water and a few capfuls of Murphy’s oil soap. Use rag moistened with oil soap mixture to clean all wood furniture, including bookshelves or hutches, desks, tables, and dining chairs. I also like to use this mixture to clean my leather furniture, although it does not specifically say on the bottle that it is intended for leather, so be sure to test a small hidden area first! Once wood is clean, polish surfaces with an oil-based furniture polish. Apply polish to damp cloth, rub on surface, than buff off with a second dry cloth.
Step 7: Clean Upholstered Furniture
Supplies needed: Vacuum with brush hose attachment, dish soap, rag
How-To: Start by vacuuming all upholstered furniture using brush hose attachment to remove all dust, lint, & pet hair. If possible, remove cushions to clean underneath as well. Fill sink or bucket with mild soap solution, then use a rag to spot clean any marks or dirt.
Step 8: Clean Baseboards
Supplies needed: Vacuum with hose attachment, dish soap, rag
How-To: Start by vacuuming along baseboards to pick up any loose dirt, lint, or pet hair. Fill sink or bucket with mild soap solution, then wipe baseboards clean with wet rag.
Step 9: Clean rugs & carpets
Supplies needed: Vacuum, baking soda, stain remover, dish soap, rag
How-To: Before beginning, be sure to check whether bag or canister is full, and empty if necessary. Also check rollers to make sure they are free of strings or debris. Vacuum rugs to remove all loose dirt and surface hair. Fill sink or bucket with mild soap solution, then spot clean rugs with stain remover and/or mild water solution. To deodorize after spot cleaning, sprinkle rug with baking soda, let sit for 20 minutes, then vacuum again.
Step 10: Clean hard floors
Supplies needed: Broom & dust pan, dust mop, wet mop, all purpose cleaner.
How-To: Before beginning, move as much furniture from the floor as possible. Starting at one end of the room, carefully sweep loose dirt and hair towards the center of floor. Methodically make your way around the room, sweeping all dirt towards the center into one pile. Sweep into dustpan and throw away. Next, do a sweep of the floor with your dust mop to remove any remaining dust or hair. Spot clean any sticky or dirty spots, or mop entire floor with wet mop and let dry.
But now that you know just what to do, it is time to get to work! To stay on task, use this handy printable checklist to help walk you through all the steps:
Part Three Assignment
Just to review, here is your third assignment:
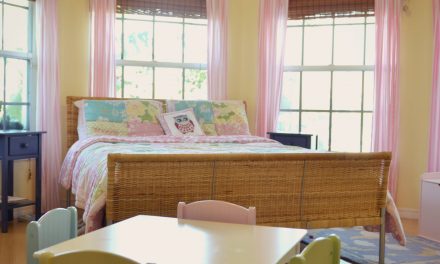
- Set aside a good chunk of time—at least 2-4 hours—sometime this week to work on deep cleaning your main living spaces—the great room, living room, family room, and/or dining room.
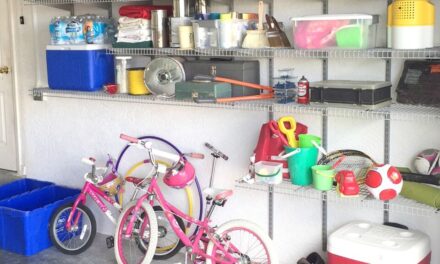
- Round up a pretty box or basket (or one for each family member) and create a collection zone for stray items somewhere in your home, whether it be on the stairs, near the front entry way, in the laundry or mud room, or in a corner of the family room.
- If possible, open up the windows to let in some fresh air as well!
* * *
The LWSL Beginner’s Guide to Cleaning:
Part 1: Getting StartedPart 2: Cleaning Supply 101Part 3: How to Clean Your Living SpacePart 4: How to Clean Your KitchenPart 5: How to Clean Your BathroomPart 6: How to Clean Your BedroomPart 7: Laundry 101Part 8: Home Maintenance & Seasonal Cleaning
Ruth Soukup
Latest posts by Ruth Soukup (see all)
- Stop Worrying About Money - July 19
- How to Fit In More Fitness - April 28
- The Most Powerful Decision You’ll Ever Make - April 27
TAKE BACK CONTROL OF YOUR HOME LIFE
 Ever feel like you just can't keep up? Our Living Well Starter Guide will show you how to start streamlining your life in just 3 simple steps. It's a game changer--get it free for a limited time!
If you love this resource, be sure to check out our digital library of helpful tools and resources for cleaning faster, taking control of your budget, organizing your schedule, and getting food on the table easier than ever before.


Cleaning your room can feel like an overwhelming task, but it is likely a quicker and easier process than you imagine! Use a vacuum cleaner that will replace your broom and turn on your favorite music at full volume. And if you still do not have a vacuum cleaner or best steam cleaner for bed bugs you can choose the best model on the site with honest reviews of users. Tackle the big tasks first and then move onto deep-cleaning your room by dusting, wiping and vacuuming all of the surfaces.
How (and how often) do you clean the actual vacuum cleaner? Thanks!
Nice blogs……….
I have been using aerosol dusters (Swiffer, Pledge, etc.) for years. How do I tell if there is a wax build up, and if so how do I get rid of it before using the cleaners you recommend?