
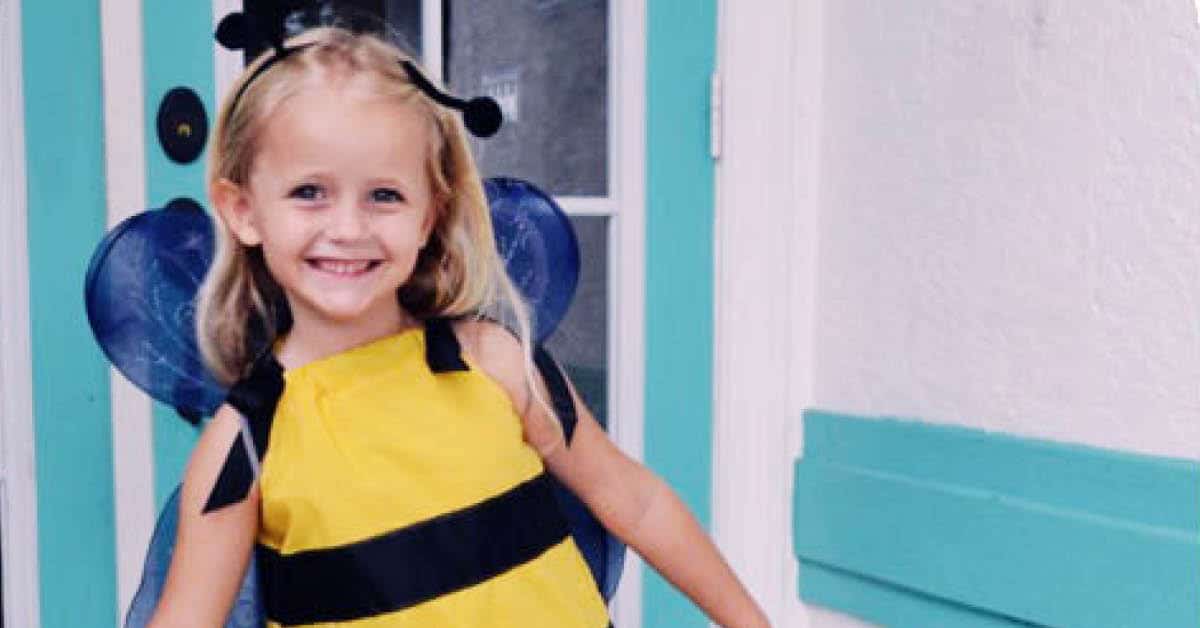
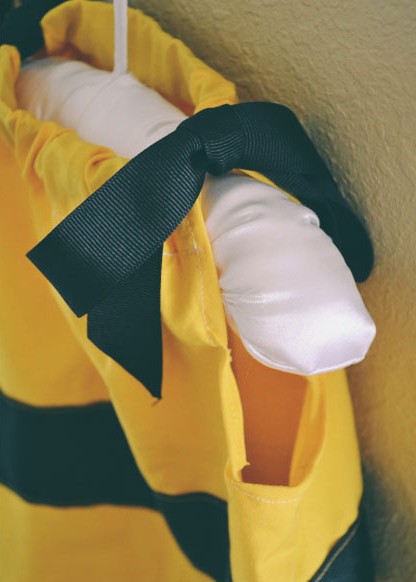
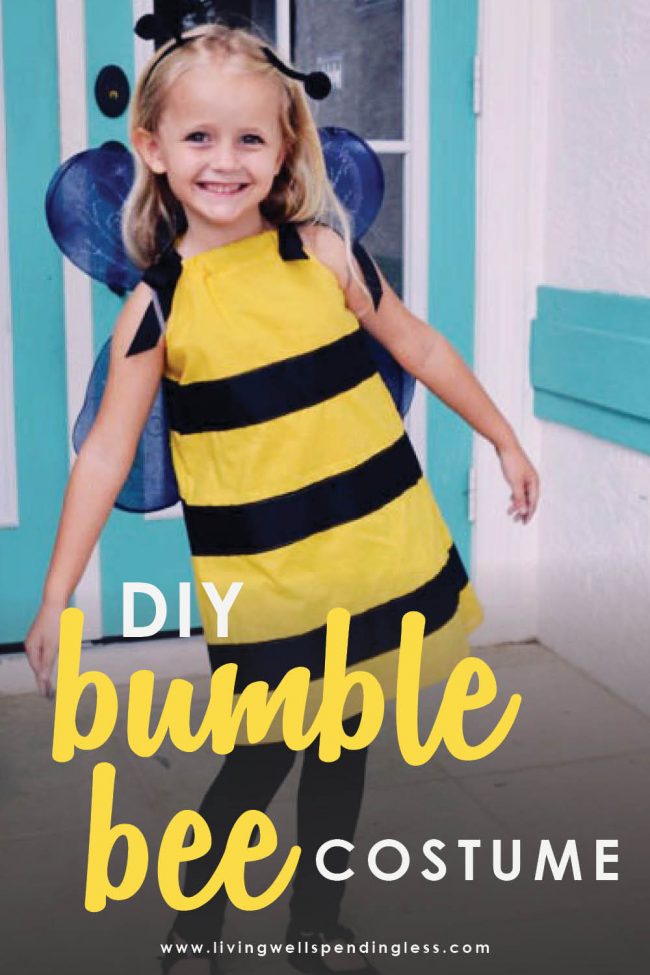
Looking for an adorable and simple costume? This bumblebee costume is adorable, and so easy to make! Your little one will love it and so will you.
I have never attempted to sew a costume before, but my daughter Maggie really wanted to be a bumblebee this year. When I started looking at the bee costumes that were available, I was appalled at the idea of anyone spending $25 or $35 per child when I knew I could make it for much cheaper.
At first I thought about making a black tutu and pairing it with a yellow & black t-shirt, but then I remembered the pillowcase dresses I made for the girls a while back, and decided that would be the cutest and easiest solution.
DIY Bumblebee Costume
Here is what you will need:
1 yard bright yellow fabric 1 roll 2-1/4″ wide black grosgrain ribbon 2 yards of 1″ wide black grosgrain ribbonI used white thread because that was already in my machine! To save money, I used some 40% off coupons at Jo-Anns and spent just under $10 on ribbon and fabric for the 2 dresses.

Step 1: Cut out the dress out of 2 identical pieces of fabric. (It is a good idea to pre-wash/pre-shrink the fabric.) The easiest way to figure out the size is to take a dress that fits and use it to measure the length, then make it a little wider. When cutting, fold it in half lengthwise so that your armholes are uniform. To make the armholes, cut a “J” shape about 6″ long and 3 inches wide.
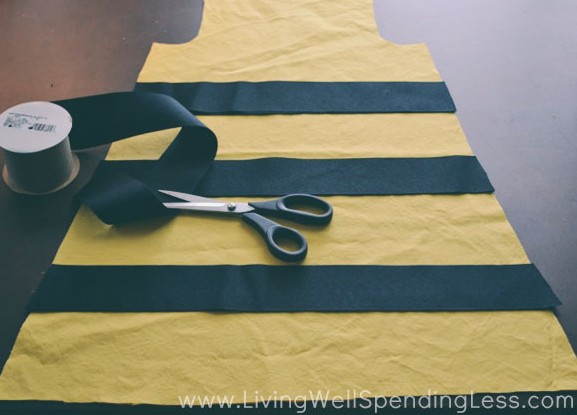
Step 2: Lay out the 2 1/4″ ribbon on the dress to make 3 stripes & cut to size. Be sure to cut 2 of each size.
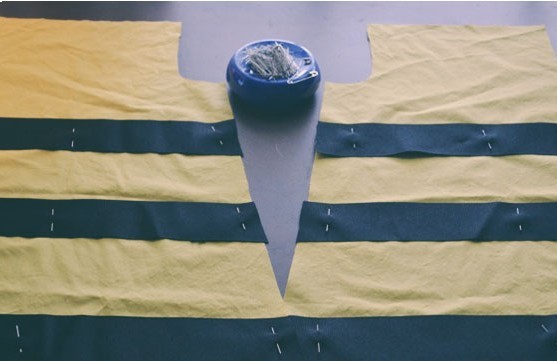
Step 3: Lay front and back of dress on table side by side, making sure the bottom edge lines up exactly. Pin the stripes in place so that they line up with each other.
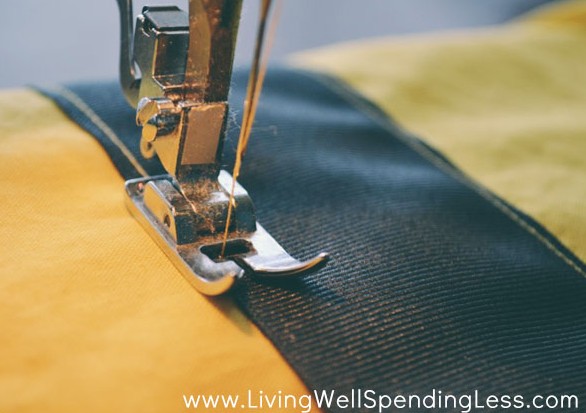
Step 4: Carefully stitch the ribbon stripes in place. This is the most time consuming part of the whole project!
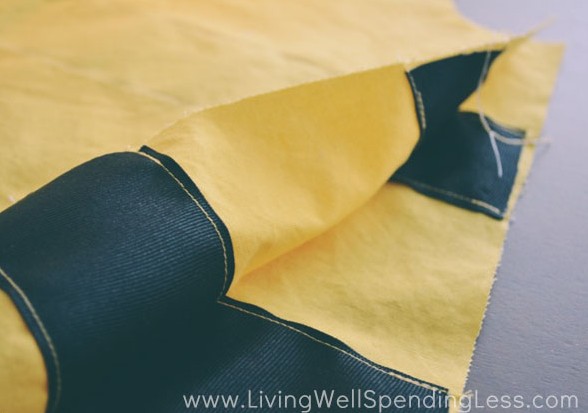
Step 5: Line up front and back pieces face to face so that stripes line up, then pin in place. Stitch each side & remove pins.
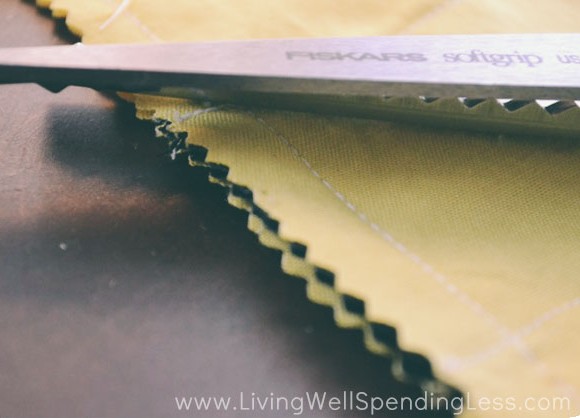
Step 6: For a cleaner finish, trim the raw edges with a pinking shears. Or, if you’re one of those fancy sewers, finish edges with a serger![]() .
.
Step 7: Fold bottom hem over twice to hide raw edges, then iron flat and stitch in place.
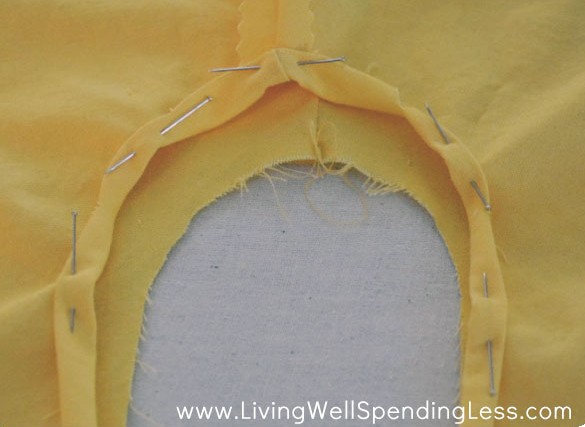
Step 8: Fold over armholes twice to hide raw edges, iron flat, then pin and carefully stitch in place. This is the trickiest part of the whole dress (but it’s really not that tricky.)
Step 9: Fold over twice top of front panel. Iron flat then sew in place, leaving a 1″ allowance for ribbon to pass through. Repeat for back panel.
Step 10: Thread approximately 1 yard of ribbon through 1″ ribbon through hem on front panel, then repeat for back panel. Tie ends together at shoulders to close armholes.
Altogether, I spent about 2 hours making two dresses. I was a little nervous about getting the stripes to line up, but it really was very easy. As with my original pillowcase dress, I sincerely apologize for these instructions if you are a “real” sewer. I am a marginal sewer at best, so If you actually know what you are doing these instructions will probably seem woefully amateur!
Wings & Antennae
With the dresses done, my little bees needed wings and antennae! I found some cute options at Gymboree, but even on sale, the total cost for 2 sets plus shipping came to almost $40. There was a slightly cheaper set on Amazon that I almost purchased with Swagbucks, but I was worried that the yellow wouldn’t match.
Plan C took slightly more effort but was definitely the cheapest option, costing less than $5 for the whole project. I found fairy wings at the dollar store and spent $2 at Walmart for a bottle of black dye.
The wings I found at the dollar store came in pink, purple & green. I chose purple because it seemed closest to black.
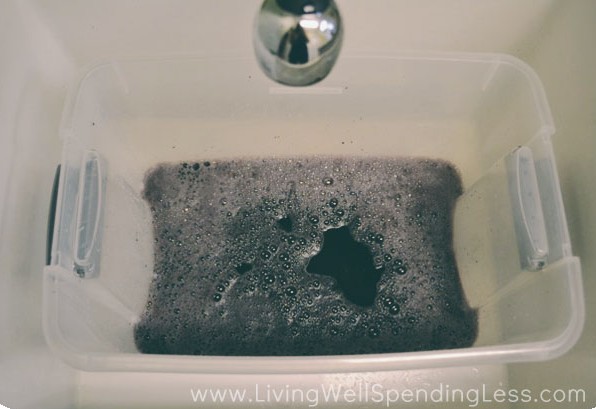
To dye the wings, I added one whole bottle of Rit Dye + 1 cup of vinegar to about 4 gallons of hot water in a plastic tub. I didn’t wear gloves but I should’ve–that dye definitely stains! Be sure to wipe up any spills right away. I let them soak for a LONG time….about an hour and a half.
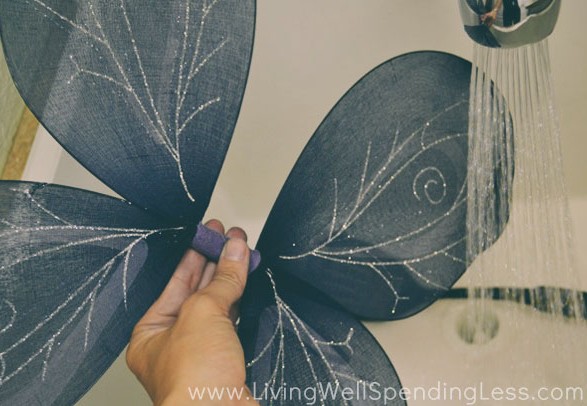
When the wings were finally ready, I rinsed out the extra dye then wiped up the sink right away to make sure nothing got stained. (The magic eraser worked nicely for wiping up spills) I then hung them up and let them dry completely. Once dry, I used a black permanent marker to color that purple piece of felt in the middle that didn’t absorb the dye.
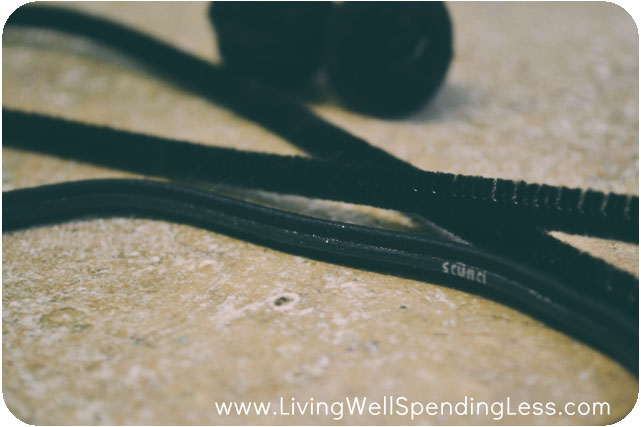
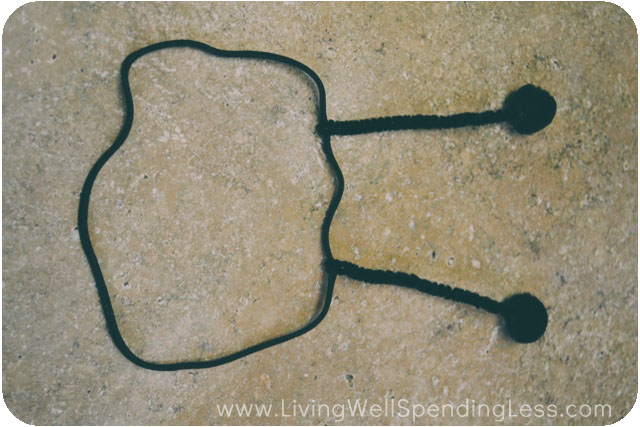
For the antennae, I used some black elastic headbands, pipe cleaners, & pom poms that I already had on hand.
The concept was pretty simple–I just twisted 2 pieces of pipe cleaner around the headband, spaced about 3 inches apart.
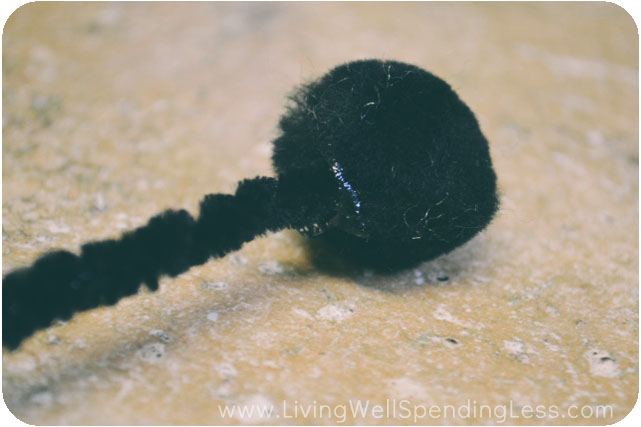
I used a generous glob of hot glue to secure the pom poms to the ends of the pipe cleaner & let them cool completely.
We live in Florida so keeping warm while trick-or-treating isn’t much of an issue. Those in cooler climates could layer a black long sleeved t-shirt and tights underneath! Trouble was napping when I took these pictures, but Princess was MORE than happy to pose in her new costume. Her only complaint? No stinger. 🙂
Have you made this bumblebee costume? How did it turn out?
Other DIY Projects You’ll Love:
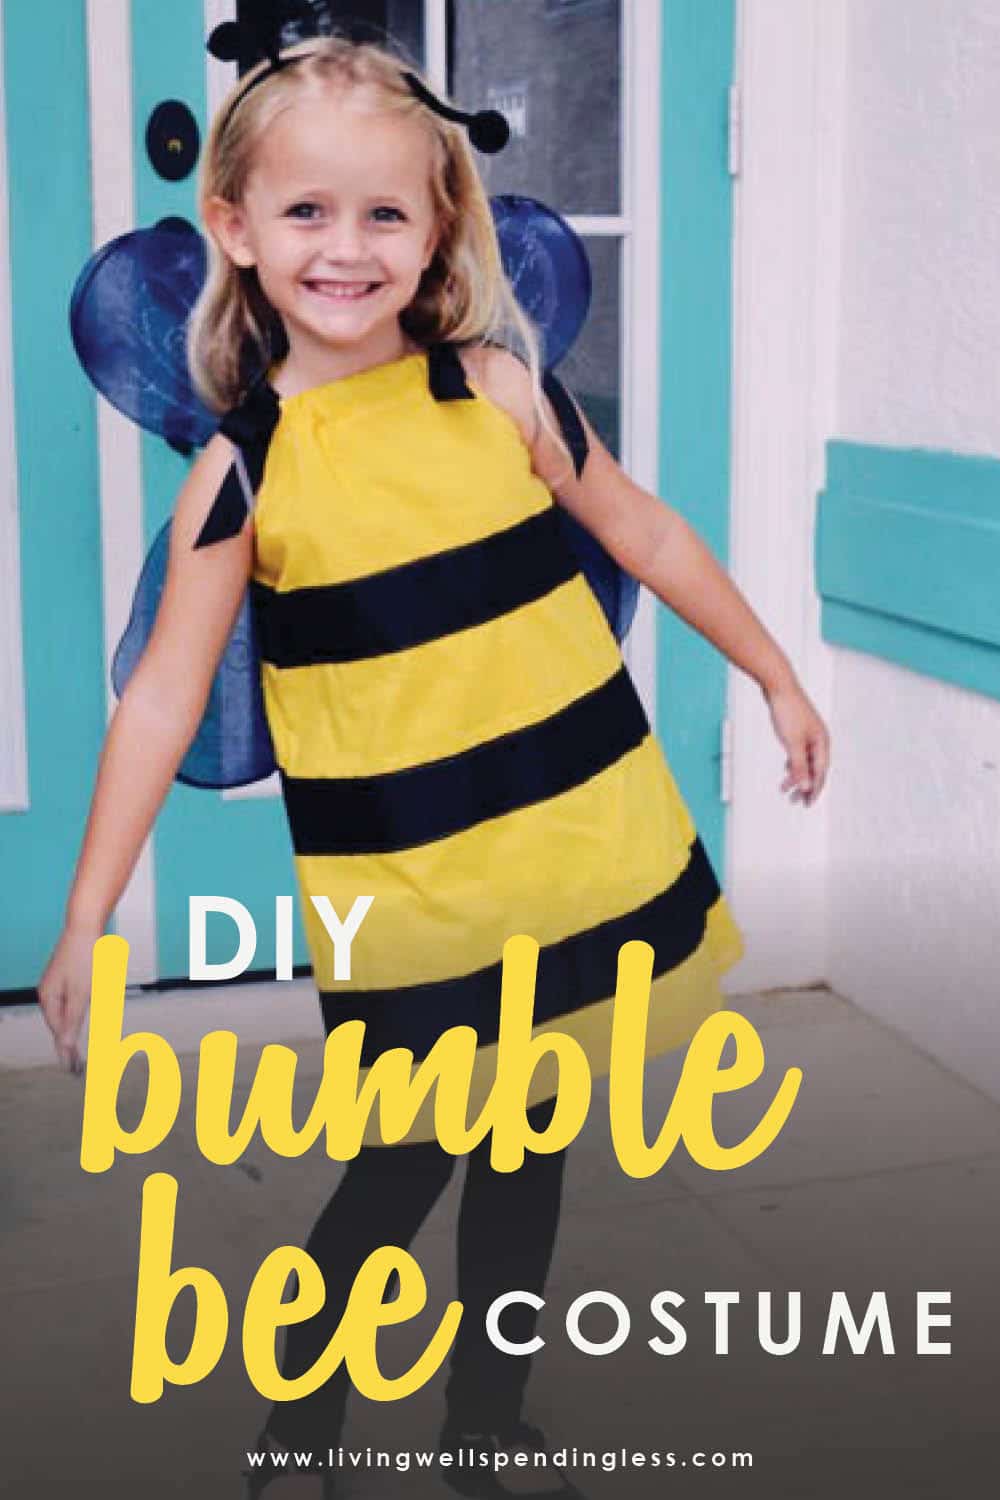
PIN FOR LATER

Ruth Soukup
Latest posts by Ruth Soukup (see all)
- Stop Worrying About Money - July 19
- How to Fit In More Fitness - April 28
- The Most Powerful Decision You’ll Ever Make - April 27
TAKE BACK CONTROL OF YOUR HOME LIFE
 Ever feel like you just can't keep up? Our Living Well Starter Guide will show you how to start streamlining your life in just 3 simple steps. It's a game changer--get it free for a limited time!
If you love this resource, be sure to check out our digital library of helpful tools and resources for cleaning faster, taking control of your budget, organizing your schedule, and getting food on the table easier than ever before.


Ah Ah Bumblebee Costume !
Hi there, I want to subscribe for this blog to take hottest updates, thus where
can i do it please help out.
%url
Repent on your sins and ask for Allah’s forgiveness on them by raising your hands and offering as much prayer as you can. Besides the increased chances
of getting cheap tickets for Dubai flights, air travel during Ramadan can prove
to be a rewarding experience for quite a few other reasons as well.
The gates of hell are closed during the holy month of Ramadan and satan is locked up.
Nice replies in return of this question with real arguments
and telling all regarding that.
Thank you for sharing your info. I really appreciate your efforts
and I am waiting for your further post thanks once
again.