
There are many, many reasons I love my stand mixer, but when husband surprised me a few years ago with an ice cream maker attachment, it brought that love to a whole new level. Homemade ice-cream? I could eat it all day long! Mmmmmm….ice cream….so good…..
When it comes to flavor, we are a family of coconut fanatics. Since another family favorite is our Silk Almond Milk–we seriously cannot get enough of either the vanilla or dark chocolate flavors–I thought it would be a fun challenge to see if I could “healthify” our ice-cream (and make it dairy-free) without sacrificing any flavor. After all, if it doesn’t taste good, what’s the point?
Husband was beyond skeptical and I have to be honest that my first attempt was a complete and utter FAIL! I didn’t wait quite long enough to make sure the ice cream mixture was sufficiently chilled before I put it in the ice-cream maker, so the bowl warmed up too quickly and the ice-cream never froze. Oops.
I was a lot more patient the second go-round, and it paid off because the resulting ice-cream was the richest, creamiest, yummiest chocolate-coconut ice cream we have ever had. Even my dairy-loving husband was impressed, and that is saying something. The best part is that you can actually feel good about serving it to your kids. It is chock-full of healthy goodness like almond milk, coconut oil, and coconut milk, and contains less sugar than traditional ice cream.

Here is what you need:
1/3 cup cocoa powder 1/4 cup + 1 tablespoon coconut oil 3/4 cup sugar 1 can coconut milk 1 1/2 tsp vanilla 3 cups Silk Almond Milk (I used the vanilla flavor) 1 cup toasted coconut, plus extra for topping (toast coconut by spreading it on a cookie sheet and baking at 350 degrees for 10 minutes)Note: If you are using the ice cream attachment bowl, turn your freezer to its coldest setting, then make sure the bowl has been chilled in this very cold freezer for at least 24 hours! Making ice cream is not hard, but this part is important!

Step 1: Whisk together cocoa powder, sugar, and coconut oil in a large saucepan over medium-low heat.

Step 2: Shake coconut milk well, then add coconut milk & vanilla to sugar mixture. Whisk well. Heat to almost boiling, stirring frequently, until mixture just begins to bubble.

Step 3: Stir in Silk Almond Milk. Heat again to almost boiling. Remove from heat.

Step 4: Turn your refrigerator to the coldest setting; chill mixture overnight or for at least 8-10 hours. Do not get impatient and try to make the ice cream before the mixture is completely chilled!

Step 5: Insert ice cream bowl and paddle on stand mixer, then quickly pour in chilled chocolate mixture.

Step 6: Turn mixer on low and mix for approximately 10-15 minutes, until ice cream begins to thicken.

Step 7: Add toasted coconut to mixture, then continue mixing on low speed for another 10-15 minutes.

Step 8: When ice cream has reached the consistency of soft-serve, remove from ice cream maker and place in large storage container. Freeze ice cream for 2-3 hours, then scoop and enjoy! (You can eat it immediately, but it will be quite soft.)

Yum!


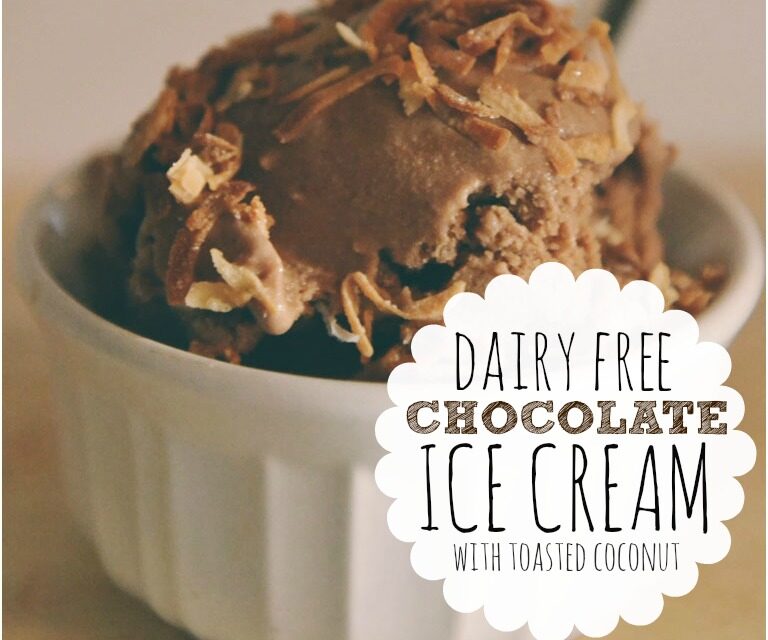
Dairy-Free Chocolate Ice Cream with Toasted Coconut
Ingredients
- 1/3 cup cocoa powder
- 1/4 cup 1 tablespoon coconut oil
- 3/4 cup sugar
- 1 can coconut milk
- 1 1/2 tsp vanilla
- 3 cups Silk Almond Milk I used vanilla flavor
- 1 cup toasted coconut plus extra for topping (toast coconut by spreading it on a cookie sheet and baking at 350 degrees for 10 minutes)
- ice cream maker
Instructions
- Whisk together cocoa powder, sugar, and coconut oil in a large saucepan over medium-low heat.
- Shake coconut milk well, then add coconut milk & vanilla to sugar mixture. Whisk well. Heat to almost boiling, stirring frequently, until mixture just begins to bubble.
- Stir in Silk Almond Milk. Heat again to almost boiling. Remove from heat.
- Turn your refrigerator to the coldest setting; chill mixture overnight or for at least 8-10 hours. Do not get impatient and try to make the ice cream before the mixture is completely chilled!
- Insert ice cream bowl and paddle on KitchenAid stand, then quickly pour in chilled chocolate mixture.
- Turn KitchenAid on low and mix for approximately 10-15 minutes, until ice cream begins to thicken.
- Add toasted coconut to mixture, then continue mixing on low speed for another 10-15 minutes.
- When ice cream has reached the consistency of soft-serve, remove from ice cream maker and place in large storage container. Freeze ice cream for 2-3 hours, then scoop and enjoy! (You can eat it immediately, but it will be quite soft.)
Recipe Notes
If you are using the KitchenAid ice cream attachment bowl, turn your freezer to its coldest setting, then make sure the bowl has been chilled in this very cold freezer for at least 24 hours! Making ice cream is not hard, but this part is important!
* * *
Have you ever made homemade ice cream? What’s your favorite flavor?
TAKE BACK CONTROL OF YOUR HOME LIFE
 Ever feel like you just can't keep up? Our Living Well Starter Guide will show you how to start streamlining your life in just 3 simple steps. It's a game changer--get it free for a limited time!
If you love this resource, be sure to check out our digital library of helpful tools and resources for cleaning faster, taking control of your budget, organizing your schedule, and getting food on the table easier than ever before.


This looks sooo yummy! I use Silk unsweetened almond milk instead of dairy for most everything, so I can’t wait to try it in ice cream. I like their coconut milk also, and am wondering if I could use it instead of the canned coconut milk- do you know how much I would use?
Looks awesome! Can’t wait to try it with my ice cream maker. I only use organic almond milk though, as almonds are known to be sprayed very heavily with pesticides. Thanks for the recipe!
LOVE LOVE LOVE this recipe! We are huge dairy-loving, ice cream addicts over here and were looking for a nice *healthier* and more natural alternative to heavy, fatty, ice creams. This is seriously amazing stuff! I had planned to make it after dinner one night and failed to thoroughly read the part about allowing everything to chill. As I got out all of my ingredients and was ready to get mixing, my heart sank because I didn’t have the time to allow everything to cool down. In a pinch, I discovered a great way to make this recipe if you’re short on time….without heating/cooking it!
-I melted the coconut oil in a small bowl in the microwave. It only took about 15 seconds. I watched super closely to make sure it was *just* melted, but not heated.
-Then I whisked the cocoa powder into the coconut oil until completely blended and smooth.
-I poured the can of coconut milk into my large mixing bowl and then whisked and slowly added the coconut oil/cocoa powder mixture into that.
From there, I just whisked in the remaining ingredients into the big bowl… and voile! Same result!
I found that if you just melt the coconut oil (but not seriously heat it up), the entire mixture stays nice and cool. When I added it to my ice cream maker bowl, it froze perfectly!
I’m a big nut/chocolate addict, so I added 1/2 cup of roasted, salted, chopped almonds and 1/2 cup of chopped dark chocolate with the toasted coconut.
It tastes just like an almond joy bar!!!!
Hopefully this little tip helps if you ever want to make this in a pinch! 🙂
*I’ve also made this recipe once with light coconut milk (when I didn’t have the real stuff on hand), once with agave nectar and once with 100% pure organic maple syrup…. just to try subbing for sugar. All still tasted great!
Love your blog!!!! You are such an inspiration! Keep it up! My house/organization would be a disaster without you!
Laura
Great ideas! Thanks, Laura!
This recipe looks great and I may just try it as my son is very lactose intolerant. My question, however, is can you replace the coconut products for another, as I myself am allergic to coconut. Thanks.
Can this be made sugar free…like with agave or splenda or sweet n low…We are housefull of lactose free, sugar free kids and adults, because of allergies and Diabetes.. We all miss ice cream so much….